Key Takeaways
A reliable time lapse camera is chosen around the project, not just the camera specification sheet.
- Define the required duration, interval, viewpoint, and final video quality before buying.
- Match battery, solar, or mains power to the site and maintenance access.
- Treat mounting, weather protection, storage, and backup as part of the camera system.
- Test exposure, focus, framing, and connectivity before the full recording begins.
- For construction projects, a dependable visual record can support reporting, communication, and review.
Understand how a time lapse camera works
A time lapse camera takes individual photographs at set intervals rather than recording continuous video. Those frames are then played in sequence, making slow changes visible in a short finished clip. The right setup can cover anything from a single day to many months, provided the camera, power, storage, and mounting plan are suited to the duration.
How interval photography creates time lapse video
You begin by choosing how often the camera should capture a frame. A short interval records frequent movement, while a longer interval is usually more suitable for gradual construction progress, plant growth, or changes in a landscape. When the images are played back at a normal video frame rate, hours or months of activity are compressed into a concise visual record.
The final appearance depends on both the interval and playback speed. If work happens quickly, an interval that is too long can make important steps disappear. If the scene changes slowly, capturing too frequently can create unnecessary files without adding useful detail.
Time lapse cameras vs. action cameras and smartphones
An action camera or smartphone can work for a short creative project, but leaving a personal device fixed in place for weeks may be inconvenient. You also need to consider battery charging, storage, notifications, movement, and exposure to weather. A dedicated time lapse camera is designed around repeated capture, unattended operation, or a simpler long-duration workflow.
Your phone may still be useful for a quick test of the angle and field of view. For broader background on modern phone capabilities, see this smartphone camera guide, but do not assume that a phone designed for everyday use is automatically suitable for a months-long installation. The practical choice depends on access, protection, power, and the importance of the record.
Key features for unattended shooting
For unattended work, look beyond headline resolution. Interval control, scheduling, battery performance, external power, storage capacity, weather protection, and a secure mounting method all affect whether the camera continues recording after installation. A camera with impressive image quality is not useful if it stops after two days or shifts position in the wind.
You should also check whether the camera produces a finished time lapse or leaves you with a large sequence of still images to process. Either workflow can be valid, but it changes the time and software you will need after capture.
When a dedicated camera is the better choice
A dedicated camera is usually the better choice when the equipment must remain in place, operate with limited supervision, or produce a consistent record across changing conditions. This is particularly relevant when several stakeholders need to review progress rather than simply watch a short personal project.
For construction teams, Construction Time Lapse Specialists focuses on planning the camera setup around project requirements, site conditions, capture frequency, viewing angle, power, and storage. That planning stage is often more valuable than choosing a camera from a specification list alone.
Define your project requirements
Before comparing models, write down what the camera must show and how the footage will be used. A project update, compliance record, marketing film, and personal archive may need different framing, resolution, capture intervals, and access arrangements. Clear requirements prevent you from paying for features that do not improve the finished record.
Construction and renovation documentation
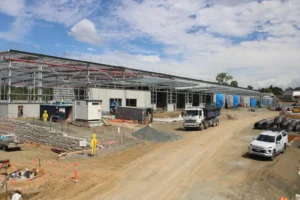
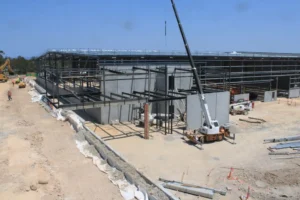
For a construction or renovation project, identify the milestones that need to be visible: excavation, structural work, installation, finishing, and handover. Consider whether one viewpoint is enough or whether separate cameras are needed for the overall site and a detailed work area. Your recording plan should also account for periods when little visible work occurs.
A construction project may run through dust, rain, changing light, temporary obstructions, and restricted access. A durable installation and a defined maintenance schedule matter just as much as the camera itself. The construction camera planning guide provides a useful way to think through duration, intervals, site conditions, resolution, power, storage, and remote access.
Outdoor landscapes and changing environments
Outdoor scenes place extra demands on the camera. Sunlight, cloud, rain, condensation, moving vegetation, and seasonal changes can all alter the image from one frame to the next. Choose a position with a stable horizon and enough clearance that growing plants, site equipment, or temporary fencing will not block the subject.
If the camera will be difficult to reach, plan for extended power and protection before installation. You should also decide whether changes in weather are part of the story or a distraction that needs to be minimised through framing.

Events, travel, and creative projects
Events and travel usually have shorter recording periods, so portability and quick setup may matter more than multi-month endurance. You may want a wider view for a venue or city scene, while a more controlled creative project may benefit from a fixed composition and carefully timed intervals.
For a day-long event, check storage and battery capacity before the start. For a creative project, make a short test sequence so you can confirm that movement, lighting, and the final playback speed feel right.
Indoor monitoring and progress tracking
Indoor projects are often easier to power and protect, but they can still be difficult to record consistently. Artificial lighting may flicker, people may move equipment in front of the lens, and a camera placed too close to a wall can produce an unhelpfully narrow view. Choose a position that shows the work area without becoming a hazard.
If the record is being used for internal updates, agree on who will review it and how often. This keeps the camera project connected to a practical reporting process rather than creating footage that nobody checks.
Short-term versus long-term recording
Duration affects nearly every decision. A short project may be manageable with a battery and local memory card, while a long installation may need solar or mains power, larger storage, remote access, weather protection, and scheduled maintenance. Establish the likely end date, but allow for delays and inactive periods.
For long projects, decide whether you need continuous coverage or only selected working hours. A schedule can reduce storage and power demands, provided it does not remove the milestones you need to document.
Compare the most important camera features
Specifications are useful only when they answer a project question. Resolution affects how much detail you can retain, interval settings affect how the action reads, and power and storage determine whether recording continues. Compare features as a complete operating system rather than ranking one number above everything else.
Resolution, frame rate, and image quality
Higher resolution gives you more flexibility to crop or display footage on larger screens, but it can also increase file sizes and power use. Consider the final delivery format and the distance between the camera and the subject. A well-framed, stable image is often more useful than a higher-resolution image with poor visibility.
You should also consider low-light performance, colour consistency, and whether the camera can maintain a useful image from daylight into evening. The best setting is the one that preserves the details your audience needs to see.
Interval settings and scheduling options
A time lapse camera should let you select an interval that matches the speed of change. Construction progress may need a different setting from traffic, clouds, or an event. Scheduling can be useful where work takes place only during defined hours, but it should be configured carefully so the camera does not miss early starts, late finishes, or key milestones.
Write the intended interval into the project plan and record any changes. That simple note helps explain gaps or differences in the finished sequence months later.
Battery life and external power support
Battery life is shaped by capture frequency, temperature, screen use, connectivity, and the camera’s internal design. Treat the stated runtime as a planning reference rather than a promise for every installation. External power support gives you more options when access is limited or the project extends beyond the original schedule.
For a commercial site, Construction Time Lapse Specialists covers equipment selection, installation, site conditions, project duration, and the practical use of camera systems for progress monitoring and reporting. Those considerations should be resolved before the camera is mounted.
Storage capacity and file management
Storage needs depend on resolution, interval, recording hours, file format, and project duration. Work out the expected number of frames or finished clips, then add a margin for delays and retakes. If the camera creates individual images, make sure your computer and editing workflow can handle them without an awkward transfer process.
A simple estimate is easier to review when the main variables are written down:
| Project factor | Question to answer | Why it matters |
|---|---|---|
| Capture interval | How often will a frame be taken? | Determines frame count and motion detail |
| Recording schedule | Will the camera run all day? | Affects storage and power demand |
| Image format | Still sequence or finished video? | Shapes editing and transfer needs |
| Project duration | How long might the work continue? | Sets the required capacity and maintenance plan |
After estimating these variables, test the workflow with a short sequence. A calculation may look adequate on paper but fail if the camera records larger files than expected or if the final delivery requires duplicate copies.
Weather resistance and operating temperature
Outdoor suitability is more than a weather-resistant label. Check the stated operating temperature, housing quality, cable protection, mounting method, and exposure to dust, rain, wind, and direct sun. A camera can be weather resistant while its power connection or memory access remains vulnerable.
If the site is exposed, include the housing and installation method in the original budget. Retrofitting protection after a camera has already been affected by moisture is rarely a good project plan.
Choose the right power setup
Power is one of the most common reasons a long-term recording stops early. Begin with the location, expected duration, sunlight, maintenance access, and any restrictions on running cables. Then choose a power source with enough capacity and protection for the actual conditions rather than the ideal ones.
Battery-powered shooting for portable projects
Battery operation suits short installations, travel, temporary surveys, and locations where cables would create a hazard. It keeps the setup simple, but you must account for cold weather, capture frequency, and the time needed to return for a replacement or recharge.
Before deployment, run the camera at the intended interval and review the battery level over several days. That test gives you a more useful estimate than a brief indoor trial with the screen constantly on.
Solar power for extended outdoor use
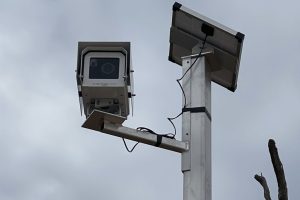
Solar power can support extended outdoor recording where the panel receives adequate light and the battery system is protected. Positioning matters: nearby buildings, trees, scaffolding, and seasonal shadows can reduce the available charge. You should also allow for cloudy periods rather than sizing the system only for a bright day.
The panel, regulator, battery, cables, and housing need to work as one system. Keep access available for inspection, because even a well-designed solar installation needs occasional checks for dirt, damage, and changed surroundings.

AC power and USB options for permanent installations
Mains power can be practical for a fixed indoor installation or a secure site with a suitable outlet. USB power offers flexibility, but the adapter, cable length, connectors, and weather protection must be appropriate for the location. Do not assume that a convenient indoor charger is suitable for a permanently exposed connection.
For a permanent installation, document who is responsible for the power source and what happens if the site supply is interrupted. A restart procedure can prevent a short outage from becoming a long recording gap.
Estimating runtime before deployment
Estimate runtime using the camera’s expected capture interval, operating conditions, power source, and planned maintenance visits. Include reserve capacity for cold nights, cloudy weather, extra capture hours, and delays to the project schedule. If the camera will be inaccessible, be more conservative than you would be for a device checked every morning.
A useful deployment review asks four questions:
- How much energy does the camera use at the chosen interval?
- How often can someone safely inspect or recharge it?
- What conditions could reduce available power?
- What warning will show that the system is close to stopping?
The answers turn a nominal runtime into an operating plan. They also show whether a different power source or a professional installation would reduce risk.
Protecting power connections from weather
Water often finds the weakest point in a system: a join, adapter, cable entry, or connector left facing upward. Use suitable glands, drip loops, protective enclosures, and strain relief, while keeping ventilation and heat management in mind. Avoid sealing components in a way that traps condensation.
Inspect the route as well as the camera. A cable that is safe on installation day may be exposed later when other trades move fencing, scaffolding, or equipment.
Plan camera placement and protection
Placement determines what the finished record can actually show. You need a stable view, a useful scale, and enough distance to account for changes on site. Treat the mount as part of the recording equipment, not as an afterthought.
Selecting a stable mounting position
Choose a solid structure that will not move when people, vehicles, or machinery pass nearby. Avoid loose temporary fencing, lightweight poles, and surfaces that transmit vibration. The position should also allow safe access for setup and maintenance without placing staff in an unnecessary work-zone risk.
Take a reference photograph of the mount and surrounding view. It can help you identify later whether a changed frame came from camera movement, a shifted object, or a genuine change in the project.
Framing the subject for visible progress
Frame the work so that the important area occupies enough of the image while retaining fixed reference points such as neighbouring buildings, road edges, or site boundaries. Leave some space for cranes, plant, deliveries, and future structures. A composition that looks tight on day one may hide the later stages.
Before leaving the camera, review the view at the expected playback size. Small details that seem clear on a phone may disappear when the final video is shared in a progress meeting.
Managing changing light and shadows
The sun moves, seasons change, and temporary structures can cast new shadows across the site. Consider the direction of light at different times of day and avoid pointing directly into a low sun where possible. Consistent exposure settings can help, but they must be tested against the range of conditions you expect.
At a construction site, reflective surfaces, dust, and bright safety lighting can also affect exposure. Record a test through a full working period before committing to the final position.
Preventing vibration, tampering, and theft
Use secure fixings and consider whether the camera is visible from public areas or accessible from temporary platforms. Anti-tamper measures, a discreet position, and a documented inspection routine reduce the chance of accidental movement or deliberate interference. Do not obstruct walkways or create a new hazard while trying to protect the equipment.
For larger projects, Construction Time Lapse Specialists describes durable, remotely accessible systems used for visual monitoring, progress updates, and secure project access. The principle is straightforward: protection should preserve both the equipment and the integrity of the record.
Using weatherproof housings and accessories
A housing should suit the camera, climate, mounting arrangement, and expected exposure. Dust, rain, snow, wind-driven debris, heat, and condensation all deserve consideration. A weatherproof camera housing can help shield equipment from these conditions, but only when it is installed correctly and its seals and cable entries are maintained.
Check the front window for reflections and dirt after the housing is fitted. Protection is useful only if it does not introduce glare, condensation, or an obstruction in front of the lens.
Evaluate storage, connectivity, and workflow
A successful recording produces more than images; it produces files that can be reviewed, transferred, protected, and explained. Decide who needs access, how often footage will be checked, and where the master files will live. This is especially important when the camera is installed on a remote or long-running project.
Local memory cards and recording limits
Local memory cards are simple and can work well when the camera is easy to reach. Their limits become more significant when a site is remote or when the camera records high-resolution images for months. Check card compatibility, expected capacity, overwrite behaviour, and whether the camera gives a clear warning before storage is full.
Keep a record of the card installed, the date of the last inspection, and any files removed. That basic log makes it easier to explain gaps in the archive.
Wi-Fi, cellular, and remote access
Connectivity can let you check status, view progress, or retrieve files without visiting the camera. Wi-Fi may suit a controlled site, while cellular access can be more practical where there is no reliable local network. Both depend on coverage, power, security, and a suitable data plan.
Remote access is not a replacement for physical checks. Lens cleaning, mounting inspections, power checks, and weather damage may still require someone on site. For project stakeholders, secure access should also be matched with clear permissions and a defined viewing process.
Reviewing and transferring image files
Set a routine for reviewing footage before the project is too far advanced. Early checks can reveal framing errors, flicker, blocked views, failed uploads, or an interval that does not show enough movement. Transfer files using a consistent naming structure that includes the project, camera position, and date.
If a client, regulator, or project manager may need a particular period later, do not rely on an informal folder of mixed exports. Keep the original material and document any edited versions separately.
Combining still images into a finished video
If the camera does not create a finished time lapse, you will need software to sequence the still images, set a frame rate, and export the result. You may also want to crop, stabilise, colour-correct, add dates, or combine views. Plan this workflow before recording so the capture settings support the final presentation.
For some projects, a finished clip is useful for stakeholder communication, while the original stills remain important as a detailed archive. Keep both when the record may support reporting or later review.
Backing up footage during long projects
A single memory card or laptop is not a reliable archive. Back up important files to a second location and decide how often that copy will be updated. For remote projects, a secure online portal or managed transfer process may reduce the risk of losing months of images to theft, damage, or accidental deletion.
The workflow described in construction data storage guidance treats storage and scheduling as part of the project plan rather than a task left until the end. That approach is sensible: footage is much harder to recreate once a milestone has passed.
Avoid common time lapse camera problems
Most failures are predictable. Cameras move, lenses become dirty, storage fills, exposure changes, and power connections loosen. A short commissioning process can identify many of these problems while they are still easy to fix.
Preventing flicker from changing artificial light
Artificial lights can cycle at a frequency that is not obvious to your eye but becomes visible as flicker across a sequence of still images. This is common indoors and may also occur around temporary site lighting. Test the camera under the actual lights and, where possible, choose settings that reduce the mismatch between exposure time and the lighting cycle.
If lighting changes during the project, record when the change occurred. That context can help you distinguish a lighting problem from a camera fault during review.
Keeping the lens clean and unobstructed
Dust, rain spots, insects, condensation, protective film, and newly installed barriers can all reduce image quality. Inspect the lens and housing window as part of every scheduled visit. Clean with suitable materials and avoid touching the optical surface unnecessarily.
Look at the full frame, not just the centre. An obstruction at the edge may hide a crane, access route, or neighbouring work area that becomes important later.
Reducing exposure and focus changes
Automatic exposure and focus can react to moving machinery, shadows, reflective surfaces, or changes from day to night. Some adjustment is natural, but repeated shifts can make the final video distracting. Use a controlled test to decide whether fixed or automatic settings better suit the scene.
Do not lock settings without considering the full project period. A setting that works in bright afternoon light may fail at dawn, dusk, or during a seasonal change.
Handling full storage and interrupted recordings
Set a warning threshold before storage is full and define who responds to it. If the camera stops after a power interruption, confirm whether it restarts automatically or requires a manual visit. Keep spare cards, cables, batteries, or adapters available where appropriate, but do not swap components without recording the change.
When a gap occurs, note its cause and duration. A transparent project record is more useful than pretending that every sequence is continuous.
Testing the setup before the project begins
Run the complete arrangement before the official start: camera, mount, power, storage, connectivity, housing, and review workflow. Check the framing at different times of day and inspect the first exported sequence on the screen where stakeholders will view it.
A final commissioning checklist can include:
- Confirming the interval, schedule, time zone, and date.
- Checking the horizon, subject area, focus, exposure, and lens condition.
- Verifying power connections, storage capacity, and remote status.
- Recording the mount position, equipment details, and responsible contact.
After the test, correct the setup while access is easy. The few minutes spent checking it can prevent weeks of unusable footage and give the project team confidence in the visual record.
Conclusion
Choosing a time lapse camera for a long-term project is really an exercise in planning a dependable recording system: define what must be visible, match the camera to the interval and environment, protect its power and position, and create a workflow for checking and preserving the footage. When those decisions are made before installation, your final record is more likely to support clear communication, progress reporting, and a credible account of how the project developed.
Frequently Asked Questions
What is the best interval for a long-term time lapse?
Choose an interval according to how quickly the subject changes. Construction milestones may need a longer interval than traffic or events, but you should test the setting so important movement remains visible in the finished sequence.
How long can a time lapse camera record?
Recording time depends on power, storage, capture frequency, weather, connectivity, and the camera’s operating design. A project lasting months may require external power, larger storage, scheduled maintenance, or remote checks.
Is a time lapse camera suitable for construction sites?
Yes, provided it is installed with a stable mount, suitable weather protection, adequate power, and enough storage. You should also plan the viewpoint around milestones and ensure the recording supports the way the project team will use it.
Should you use battery or solar power?
Battery power is often suitable for short or portable projects. Solar can be more appropriate for extended outdoor recording, but it must be sized for local sunlight, cloudy periods, battery storage, and the camera’s actual energy demand.
Do you need internet access for time lapse recording?
No. A camera can often record locally, but internet or cellular access may help with remote status checks, file transfer, and stakeholder visibility. Connectivity should be treated as part of the workflow rather than assumed to solve every maintenance need.
How do you prevent a time lapse camera from being stolen?
Use a stable, secure mount, consider the camera’s visibility and access from public areas, protect cables, and schedule inspections. On a construction site, coordinate the installation with site safety requirements and other trades.
How do you make a time lapse video from still images?
Import the images into suitable editing software, order them by capture time, set the playback frame rate, and export the sequence as a video. Keep the original images separately if they may be needed for detailed review or project records.