Key Takeaways
A well-planned construction time lapse camera becomes a reliable project record rather than just a collection of attractive images.
- Define whether the footage is for reporting, stakeholder communication, marketing, handover or site monitoring.
- Match the camera, power supply, storage and connectivity to the project duration and site conditions.
- Choose a stable viewpoint that keeps the work area visible as the build changes.
- Test capture settings, framing and remote access before leaving the system unattended.
- Review, protect and edit the footage so it remains useful throughout the project lifecycle.
Define your construction time lapse goals
Start by deciding what the footage needs to achieve. A developer may want clear milestone updates, while a builder may need a visual record for meetings, reporting or handover. Marketing and public communication may call for a more polished final film. Defining the purpose early makes decisions about camera position, capture interval and storage much easier.
Documenting progress for clients and stakeholders
A consistent view gives clients and stakeholders a straightforward way to understand what has changed between inspections. It can show the progression from early earthworks through structure, services, finishes and completion without asking everyone to interpret scattered site photographs. For larger projects, a secure remote portal can also make progress visible to people who are not on site.
The strongest record is not necessarily the most dramatic one. It is the one that preserves the same useful context over time, so each update can be compared with the last. Construction Time Lapse Specialists provides visual monitoring services using 4K cameras, durable systems and secure remote portal access for viewing site progress.
Creating marketing and project handover content
Marketing footage needs a little more planning than routine progress documentation. Consider which views will explain the finished development, how the surrounding context will appear and whether the final edit should focus on construction activity or the completed result. A camera can gather the source material, but the final story still depends on sensible selection and editing.
Handover content benefits from the same discipline. Dates, stages and consistent viewpoints can help create a visual history that complements formal project records. If the project also needs aerial perspectives or detailed stills, the same provider may combine time lapse systems with drone imaging and high-resolution photography where appropriate.
Monitoring milestones, delays and site activity
Time lapse footage can help teams review when visible changes occurred and whether planned activity appears to have progressed. It should support, rather than replace, site diaries, schedules, inspections and formal records. Capture settings should reflect the pace of work: a project with slow structural changes needs a different interval from one with busy daily activity.
For a useful monitoring record, agree on milestone dates before installation. Record the start of the project, major pours, structural changes, façade work, services installation and practical completion. This turns footage into a reference that can be discussed alongside the programme instead of a video that is only watched at the end.
Matching camera coverage to project size
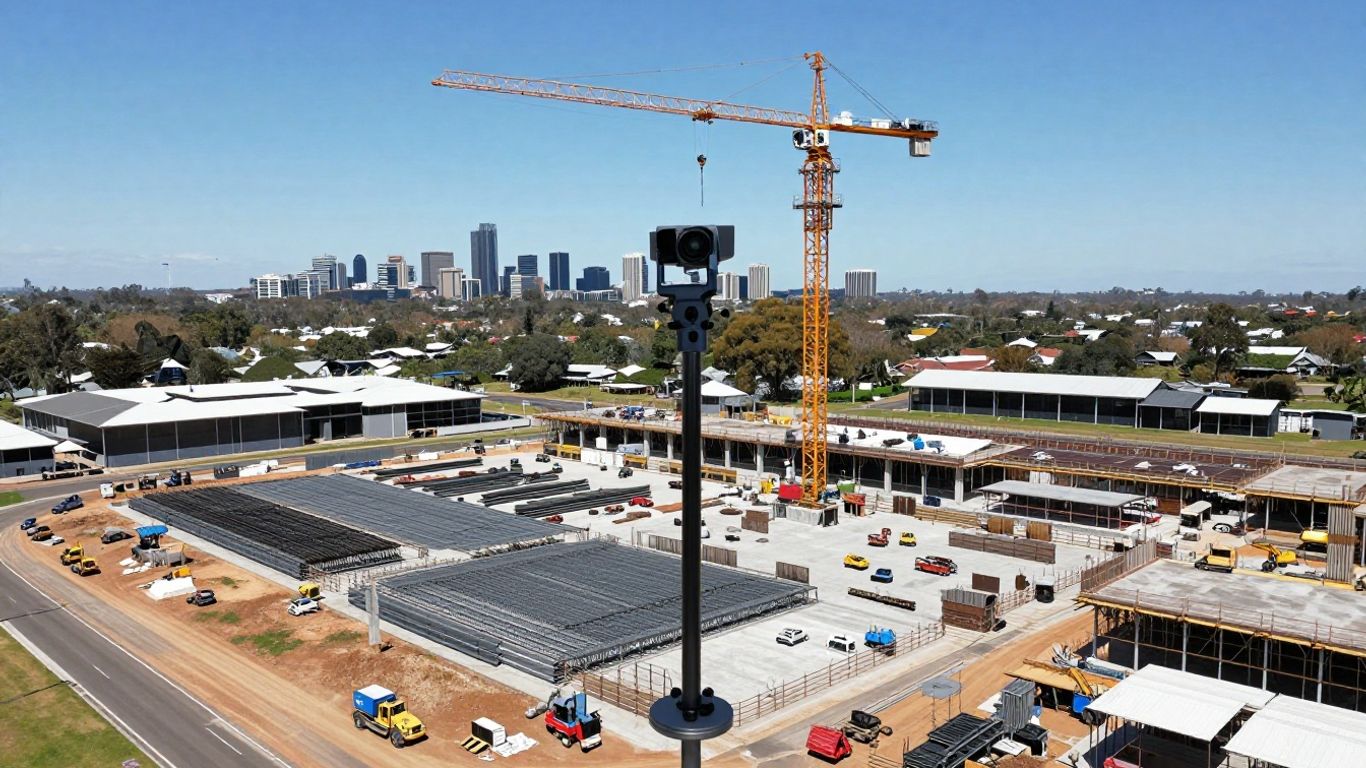
One viewpoint may be enough for a compact build, but a high-rise, civil or infrastructure project can have several work fronts that never appear together. Map the site before choosing the equipment. A second camera may be justified when buildings, plant or changing hoardings would otherwise block important stages.
A useful planning reference is this construction time lapse guide, which brings together the core decisions around purpose, equipment, installation and ongoing capture. The aim is not to use the greatest number of cameras; it is to provide enough coverage to answer the questions stakeholders are likely to ask.
Choose the right construction time lapse camera
Camera selection should follow the job, not the other way around. Think about the recording period, expected weather, available power, network coverage, image detail and the people who will review the footage. A system that looks suitable in the office may be inconvenient on an exposed site or difficult to maintain over many months.

Image quality, resolution and shooting intervals
Resolution affects how much useful detail remains when an image is viewed on a large screen or cropped for a report. A high-resolution camera can be valuable when the viewpoint is distant or when several areas need to remain visible in one frame. The interval should reflect the rate of change rather than being chosen by habit.
A short interval captures more activity but creates more files and uses more power. A longer interval reduces the data burden and may suit slow construction stages. Before committing, consider how the finished sequence will be viewed, whether individual frames will be used in reports, and how much storage the project can support.
Battery life, solar power and mains options
Power planning is often the practical limit on a remote installation. Check whether mains power is available, whether a solar panel can receive enough daylight, and what backup is needed during poor weather or interruptions. Battery-only operation may suit a short installation, but longer projects need a clear maintenance plan.
Write down the expected capture schedule, network equipment, battery capacity and inspection frequency. These details make it easier to identify a weak point before the camera is mounted. They also help when comparing a purchase with time lapse camera hire, particularly if the project duration or site requirements may change.
Mobile connectivity, cloud storage and remote access
Remote access is useful when project managers, clients or consultants need to review progress without visiting the site. Confirm the available mobile signal and understand how images are transferred, stored and retrieved. Cloud access should be paired with sensible permissions and a backup process rather than treated as the only copy.
Construction Time Lapse Specialists uses secure remote portal access for viewing site progress, supporting visibility across a project lifecycle. If you are comparing systems, ask how alerts, storage limits, user access and offline recovery work in the specific installation rather than assuming every service behaves the same way.
Weather resistance, security and site durability
A construction site exposes equipment to dust, rain, vibration, accidental knocks and occasional interference from moving plant or changing structures. Look for a durable enclosure and a mounting method that cannot be easily disturbed. Weather protection is only useful if cable entries, brackets and the surrounding installation are also properly considered.
Security has a physical and operational side. Keep the camera out of easy reach where possible, conceal vulnerable cabling, and record who has access to the stored images. A fixed, well-protected camera generally produces a more dependable record than one that is repeatedly moved to solve short-term visibility problems.
Plan the camera position and installation
Installation determines whether the camera remains useful for the whole build. The best position combines a broad view with enough detail to show meaningful change, while avoiding glare, obstructions and unnecessary privacy risks. Plan for the completed structure as well as the site on installation day, because cranes, hoardings and temporary buildings will move.
Selecting a clear viewpoint with useful context
A good viewpoint shows the work area and enough surrounding context to explain where each stage sits within the project. Avoid framing that is dominated by a fence, nearby wall or temporary stockpile. Check the view from the proposed height and consider whether future levels or plant will block the composition.
The camera should be aimed at a repeatable scene, not simply at the busiest activity on a particular day. A quieter angle may remain useful for longer. This site camera planning resource is helpful when weighing viewpoints, site conditions, remote access and the possibility of multiple cameras.
Estimating height, distance and field of view
Estimate the field of view from the actual mounting point, not from a product photograph. At a distance, a wide view can preserve context but make workers and smaller changes difficult to see. A closer position may show useful detail but can quickly become obstructed as the build rises.
Use a temporary test image if possible. Check the edges of the frame, the horizon, likely glare and the amount of sky. The final composition should leave enough room for the project to develop without making the current site appear too small.
Protecting equipment from damage and interference
Mounting hardware needs to resist wind, vibration and casual contact. Keep the camera clear of lifting paths, access routes and areas where later trades may need to work. Labeling the equipment internally and documenting its location can help the site team avoid removing it during routine changes.
Run cables neatly and protect exposed sections from plant, water and tampering. Schedule a quick inspection after major site changes, especially when scaffolding, cranes or temporary structures have been installed nearby. A stable bracket and an agreed owner for inspections prevent many avoidable failures.
Managing permits, safety risks and privacy
Installation must fit the site safety plan and any access, traffic or work-at-height controls. Obtain permission from the relevant site manager before entering restricted areas, and make sure contractors understand the equipment’s location. If the view includes neighbouring properties or public areas, review privacy requirements and adjust the framing where necessary.
The camera is a documentation tool, not a substitute for a security or safety system. Limit the frame to what the project needs, control user access and avoid collecting unnecessary detail. A short pre-start review with the project team can resolve these issues before they become complaints.
Configure reliable time lapse capture
Once the camera is installed, configuration should be treated as a testable process. Set the interval, exposure, schedule, storage and connectivity, then inspect the resulting images under different conditions. Small inconsistencies repeated over months can make the final sequence distracting, so it is worth spending time on the first day.
Setting the ideal capture interval
Choose an interval based on the speed of visible work and the intended output. Slow structural changes may need fewer images, while active demolition, concrete placement or busy installation stages may benefit from more frequent capture. The project schedule can also guide seasonal adjustments when the site becomes more or less active.
Avoid changing the interval casually once recording has begun. If a change is necessary, note the date and reason in the project record. That note will help explain any shift in the apparent speed of work when the footage is later edited.
Adjusting exposure for changing light conditions
Construction sites can move from hard midday sun to deep shadow, reflective surfaces and low evening light within a single day. Check how the camera handles those changes before leaving it unattended. Exposure settings should preserve detail in bright areas without making shaded parts of the site unreadable.
Review images from sunrise, midday and late afternoon where possible. Look for flare, dark foregrounds, blown highlights and noticeable shifts between frames. Consistent exposure is often more valuable than a single exceptionally bright image because it keeps the whole sequence comfortable to watch.
Using schedules to reduce power consumption
A schedule can prevent unnecessary captures during periods when the site is inactive, while still preserving the working day. It may also reduce storage and network use. Set the schedule alongside the project programme, then revisit it if working hours, daylight or construction stages change.
Record the active hours and any exclusions in the project handover notes. A schedule that saves power but misses early deliveries or evening works is not serving the project. The right balance depends on the purpose of the footage and the reliability of the available power source.
Testing framing, focus and image consistency
Before the system is left in place, compare test images taken at different times and inspect them at the size stakeholders will use. Check that the focus is stable, the horizon is level and the important work area remains visible. Confirm that the image naming, timestamps and upload process are also behaving as expected.
Use a simple test sequence to catch faults early. The following checks are usually enough to expose the most common setup problems:
- Confirm the full work area is inside the frame.
- Photograph the scene in both bright and shaded conditions.
- Verify the timestamp, interval and scheduled operating hours.
- Check that the latest image reaches the intended storage or portal.
After the test, leave the system running long enough to review more than one cycle. This gives the team a chance to correct framing or connectivity while access equipment is still available.

Manage footage throughout the project
Footage needs an owner once recording begins. Agree who checks the system, where files are stored and how often progress is reviewed. This is especially important on long commercial or infrastructure projects, where a camera may continue operating through several changes in the project team.
Storing and backing up construction images
Use a clear folder structure based on project, camera, date and milestone. Keep original images separate from edited exports, and make sure the backup process is understood by more than one person. If the system provides cloud access, confirm retention periods and download important material at agreed stages.
Do not wait until completion to discover that early images are missing or inaccessible. Test retrieval from the stored location, check permissions and keep a record of any manual transfers. A small amount of administration each week is easier than reconstructing months of footage later.
Reviewing progress without missing key events
Regular reviews help identify gaps while they can still be fixed. Look for missing days, changes in composition, stalled uploads, sudden exposure shifts and activity that does not match the programme. A short weekly check is often more useful than one large review at the end of the project.
Keep the review connected to meetings and reporting. Flag milestone images for later editing and note unusual events with dates and context. The footage becomes more valuable when it can be read alongside the site diary rather than viewed in isolation.
Combining footage from multiple cameras
Multiple cameras can provide broader coverage, but they also introduce differences in height, colour, timing and composition. Give each camera a clear identifier and keep installation notes with the image archive. When editing, decide whether the cameras will be shown side by side, cut between viewpoints or used for separate stages.
A consistent naming convention prevents confusion when several work fronts are active. Check that clocks are aligned, particularly before combining sequences. If one camera is moved, record the old and new position so viewers understand why the perspective changes.
Tracking site changes with project records
Time lapse images are strongest when paired with dated information about the work. Link key frames to progress claims, meeting notes, programme revisions or inspection records where appropriate. This creates a visual index that helps the project team find relevant moments without searching through every file.
For projects requiring a wider visual record, Construction Time Lapse Specialists can combine time lapse systems with drone imaging and high-resolution photography. Those perspectives serve different purposes, so keep the source files and dates clear rather than blending them into one unexplained sequence.
Turn captured footage into a professional time lapse
Editing should clarify the project journey. A final film does not need every frame; it needs a coherent selection that shows change at a pace viewers can follow. Start by deciding who will watch it and what they need to understand, then choose the length, format and level of detail accordingly.
Selecting milestones and removing unusable frames
Begin with the project programme and mark the stages that matter to the intended audience. Remove frames affected by rain on the lens, severe glare, maintenance, accidental movement or long interruptions. Keep the original material archived even when it is excluded from the final edit.
A short sequence can still feel complete if it shows the right transitions. Include enough time around each milestone for viewers to understand what changed. Avoid cutting so aggressively that the build appears to jump between unrelated states.
Creating smooth progress videos and summaries
A smooth film depends on consistent framing and sensible pacing more than on constant motion. If the camera remained fixed, let that continuity do some of the work. Where there are several views, use them to explain scale or a major transition rather than switching angles without a clear reason.
Create a longer master version for project records and shorter cuts for meetings or stakeholder updates. Keeping a high-quality master makes it possible to produce different outputs later without returning to the original capture system.
Adding dates, branding, captions and music
Captions should help viewers orient themselves. Dates, project stages and brief descriptions can make a sequence understandable when it is shared outside the project team. Branding should remain legible but restrained, especially when the footage is also part of a formal handover record.
Choose music and transitions to suit the audience and the purpose. A public-facing marketing film may be more polished, while a progress summary should keep the visual evidence easy to read. Check permissions for any music, logos or third-party material before publication.
Exporting videos for clients, websites and social media
Export settings should match the destination. A client presentation, project portal, website and social platform may each require different dimensions, compression and duration. Keep an uncompressed or high-quality master, then create delivery copies so the original is not repeatedly re-encoded.
Before sharing, watch the complete export rather than relying on a timeline preview. Check the opening and closing frames, captions, dates, audio levels and any visible private information. A final review protects the quality of the record and avoids sending an unfinished version to stakeholders.
Improve results and avoid common problems
Most time lapse failures are predictable: moisture, dirt, power interruptions, network gaps or a camera that has been nudged out of position. A practical maintenance routine catches these issues before they create a long break in the record. Treat the camera as part of the project’s documentation system, with an owner and a review schedule.
Preventing condensation, dirt and lens obstruction
Inspect the lens and enclosure after storms, dusty work and nearby concrete or excavation activity. Condensation can appear when temperatures change quickly, while airborne dust may gradually soften every image. Cleaning should follow the equipment instructions and be done safely without disturbing the mounting position.
Keep nearby vegetation, temporary screens and stored materials in view during inspections. The site may remain visible on the live image while the most useful part of the frame is slowly blocked. A quick physical check is sometimes more informative than a remote status message.
Troubleshooting connectivity and power failures
When images stop arriving, first identify whether the problem is power, network, storage or the camera itself. Check the last successful image, battery or mains status, signal conditions and any recent site changes. Record the outage and its resolution so recurring faults can be recognised.
Do not assume a restored connection has recovered every missed image. Confirm whether the system stores images locally, retries uploads or simply resumes from the next scheduled capture. Where the footage matters for reporting, a planned inspection or support arrangement is preferable to relying on an untested recovery process.
Keeping the camera aligned during site changes
Construction changes around the camera can create an apparent shift even when the bracket has not moved. Scaffolding, cranes, hoardings and new walls may hide the original subject or alter the balance of the frame. Photograph the installation during each inspection and compare it with the original reference image.
If the camera must be moved, record the date, old position, new position and reason. Do not splice the resulting footage together without a visual cue or caption. Clear notes preserve the credibility of the sequence and help viewers understand a change in perspective.
Reviewing performance and refining the setup
At agreed project intervals, review image quality, uptime, storage, access and relevance of the viewpoint. Ask whether the footage is answering the original purpose and whether the site has developed in a way that requires a second view or a revised schedule. Refinement should be based on evidence, not on chasing a more dramatic composition.
For further planning, this construction time lapse reference covers selection, installation, consistent framing and the use of finished footage for reporting and marketing. If the project would benefit from a tailored assessment, arrange a site consultation before installation so the location, objectives and practical constraints can be discussed together.
Arrange Your Site Coverage
For a commercial, civil or infrastructure project, speak with Construction Time Lapse Specialists about construction time-lapse photography, camera installation, remote progress viewing and supporting aerial or high-resolution imagery. A project-specific discussion can help match the visual record to your programme and reporting needs.
Conclusion
A construction time lapse camera delivers its greatest value when its purpose, viewpoint, power, storage and review process are planned before recording starts. With stable installation, tested settings and disciplined footage management, the result can support communication, reporting, handover and a clear account of the project from start to finish.