Key Takeaways
Remote construction site monitoring works best when technology is tied to clear decisions, responsibilities and project measures.
- Set monitoring goals around safety, quality, progress and communication.
- Match cameras, drones, sensors and platforms to the site’s actual conditions.
- Use remote visibility to support, rather than replace, sound site supervision.
- Protect personal information, footage and access to project systems.
- Review results throughout the project and adjust the monitoring approach as needs change.
Understanding remote construction site monitoring
Remote construction site monitoring combines visual records, live or regularly updated information and clear response procedures so project stakeholders can understand site conditions without being there. It may include fixed cameras, time-lapse photography, drone imagery, sensors, digital forms or project dashboards. The value comes less from collecting more data than from making dependable information available to the people who need to act on it. A practical site monitoring guide can help teams connect technology with responsibilities, observations and escalation procedures.
What remote monitoring involves
A remote monitoring system captures information from selected areas of a project and makes it available away from the site. A camera might record construction progress, while a drone survey provides an aerial view and a digital platform stores reports, photos or inspection notes. The system should make it easy to identify what has changed, when it changed and who is responsible for the next step.
The process normally includes capture, transmission, storage, review and response. Someone still needs to interpret the information, compare it with the programme or quality requirements, and decide whether an issue needs attention. Without that human follow-through, a live feed is merely another source of information.
How it differs from traditional site supervision
Traditional supervision depends heavily on people being physically present for observations, conversations and checks. Remote monitoring adds continuity between visits, giving managers and clients a shared visual record of work as it develops. It can reduce the need to travel for routine updates, but it does not remove the need for qualified people on site.
The strongest approach combines both methods. Site teams provide context, inspect work closely and speak with workers and contractors; remote tools provide timely evidence and a consistent record. This combination is especially useful when several stakeholders need the same information or when travel between offices and sites is costly.
Which construction projects benefit most
Long commercial builds, civil works, high-rise developments and infrastructure projects often gain the most from remote monitoring because their duration, scale or geographic spread makes frequent travel difficult. It is also useful where milestones need to be documented for clients, lenders, authorities or internal reporting.
Projects with changing site layouts need a little more planning. Camera positions, network coverage and inspection routines may need to change as structures rise, access routes move or temporary works are removed. Smaller projects can still benefit, provided the monitoring objective is specific enough to justify the equipment and review time.
The role of real-time visibility in project control
Visibility shortens the distance between an event and a management decision. A project manager can compare current imagery with the programme, ask a contractor about an unexpected change, or arrange a site visit where the evidence suggests a closer inspection is needed. This makes remote monitoring a control aid, not simply a record-keeping exercise.
The information must be timely and reliable enough for its purpose. A live view may suit access or security concerns, while a scheduled high-resolution image may be better for documenting structural progress. The right frequency depends on the decision the information is meant to support.
Choosing the right monitoring technology
Technology should follow the project question. If the priority is a dependable visual history, a time-lapse system may be appropriate; if the priority is a broad survey, aerial imagery may add useful context. Connectivity, power, weather exposure, privacy and the skills available to operate the system also matter. Construction Time Lapse Specialists provides time-lapse camera solutions, drone imaging and high-resolution photography for commercial, civil and infrastructure projects, which illustrates why a combined visual approach can be useful when one viewpoint is not enough.
Construction cameras and time-lapse systems
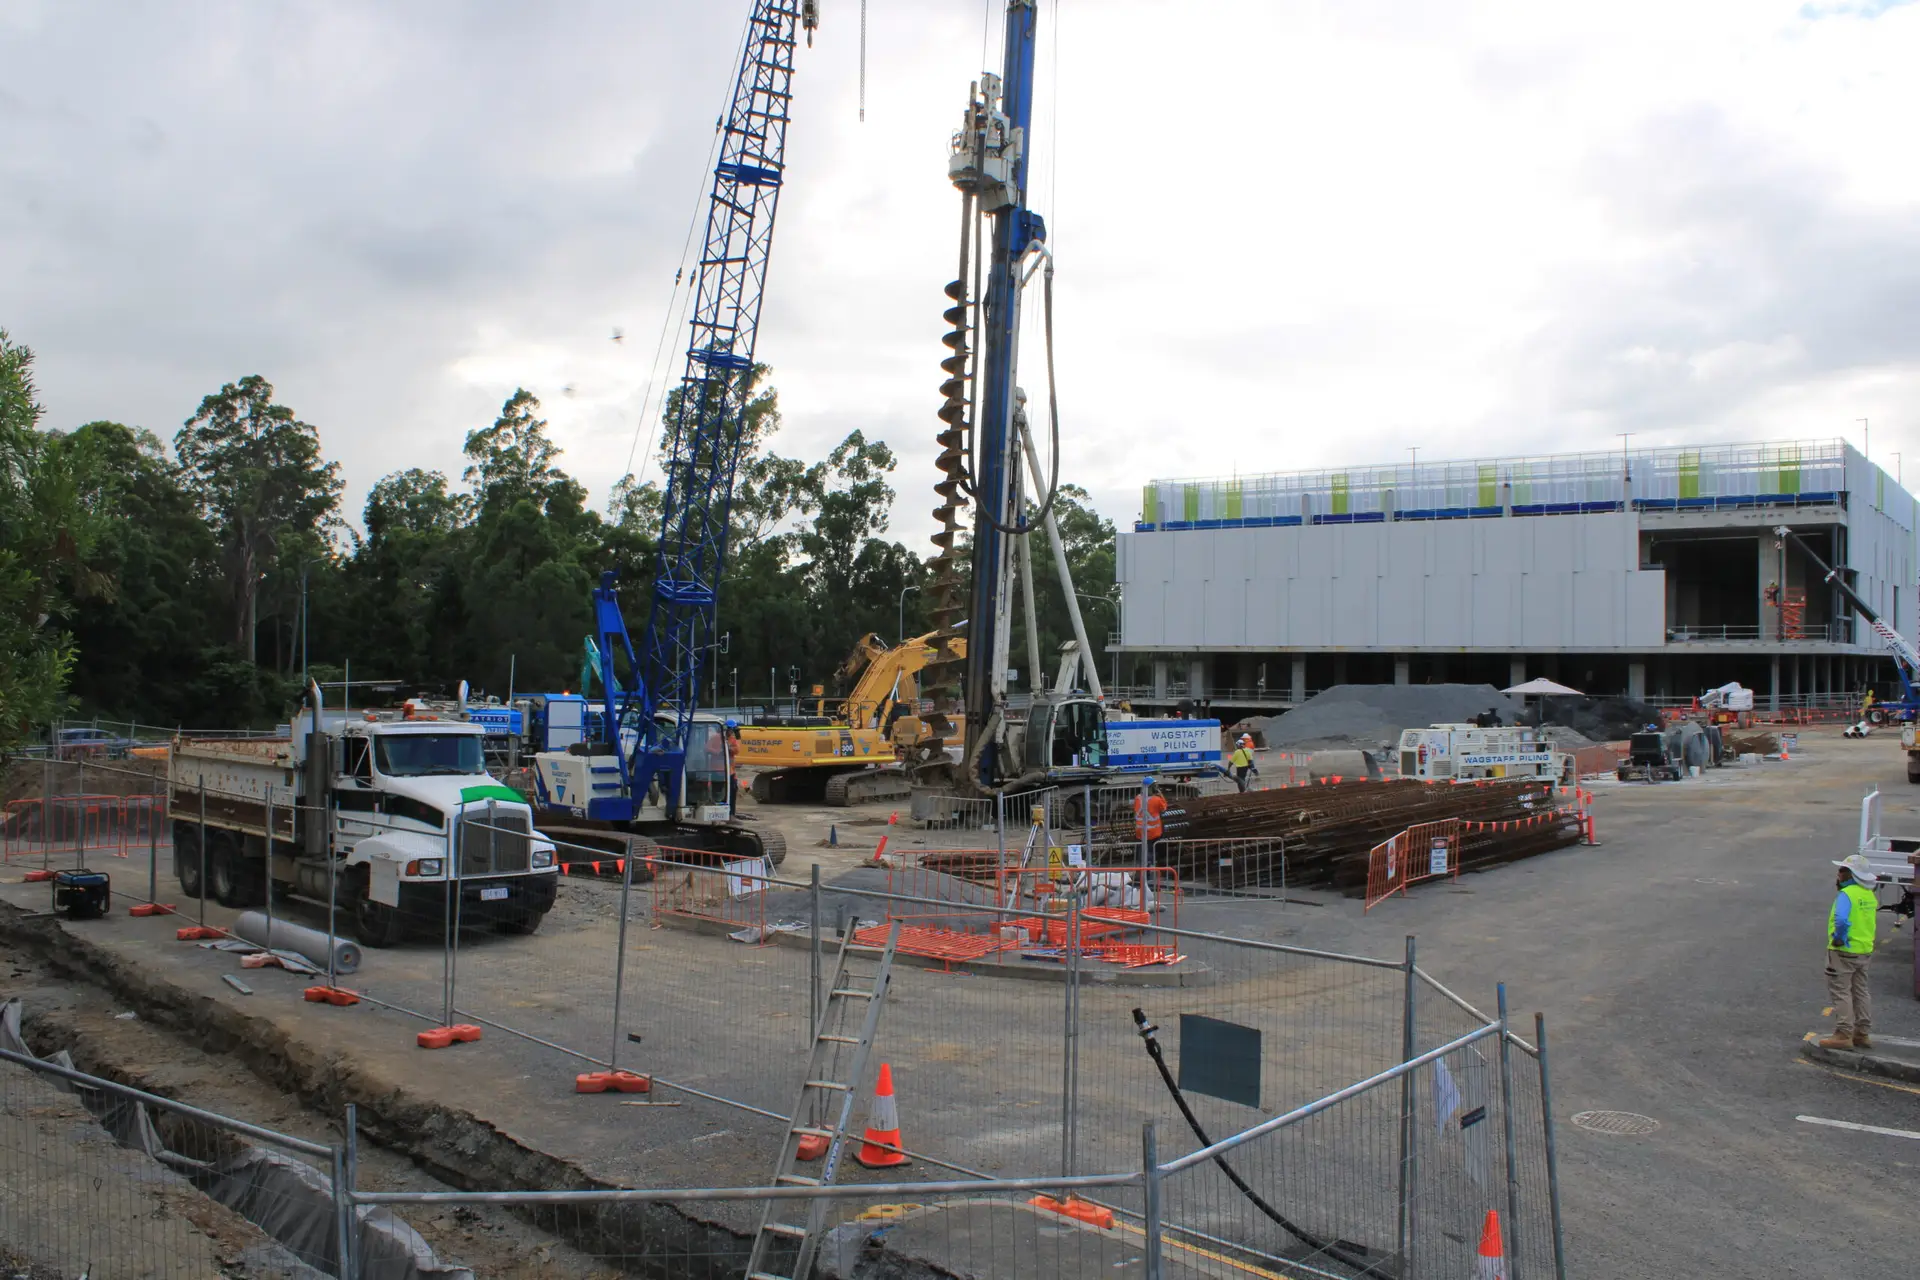
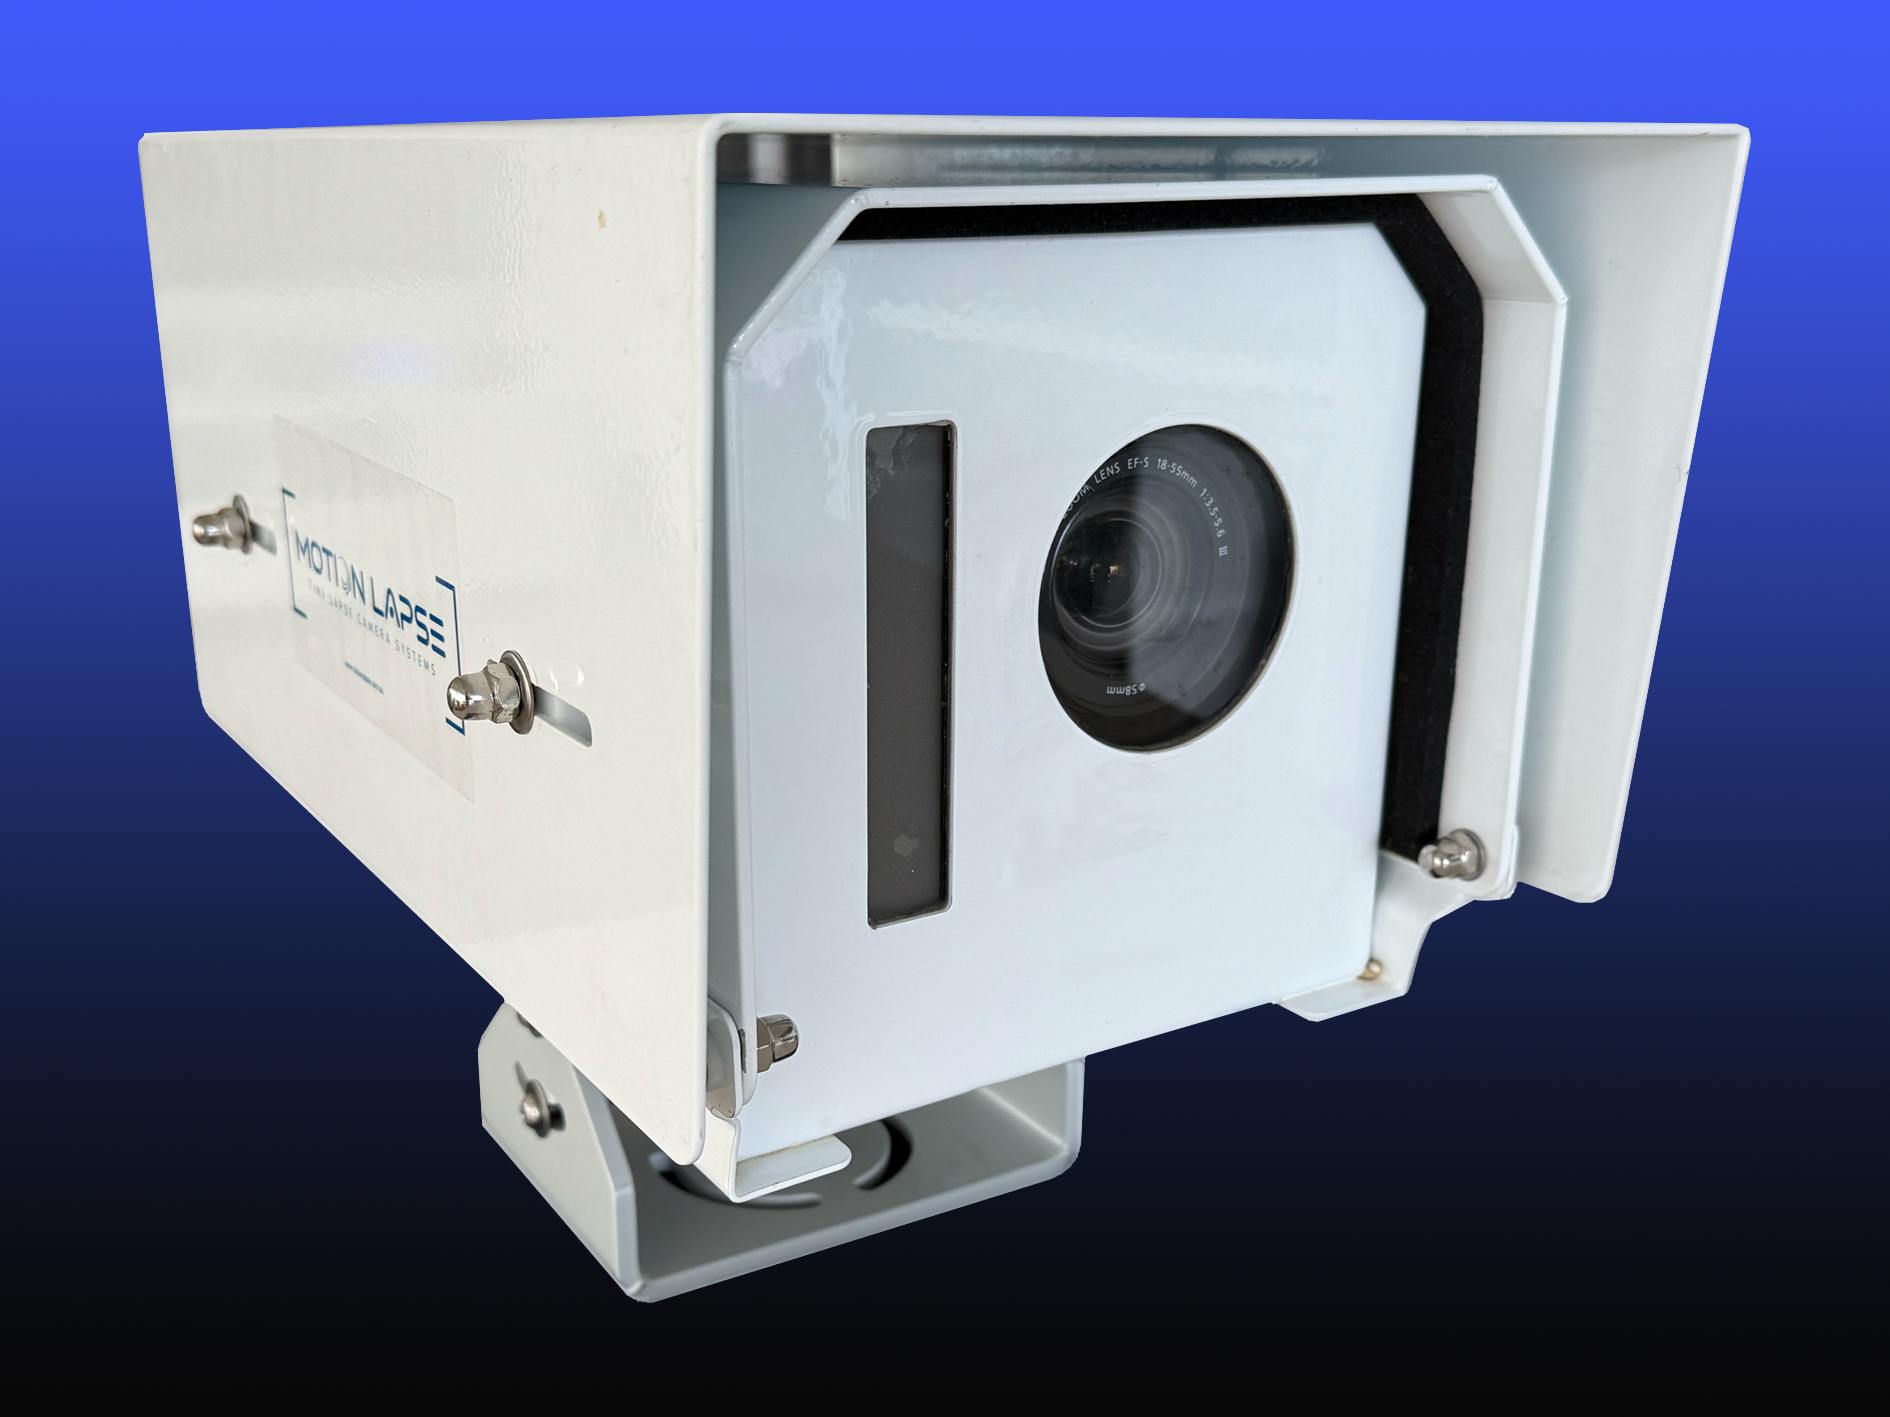
Fixed cameras can provide a consistent view of a work area, access point or major milestone. Time-lapse photography condenses months of activity into a visual record that is useful for progress reviews, stakeholder updates and project storytelling. Camera placement should be chosen around sightlines and future obstructions, not simply the easiest mounting point.
Construction Time Lapse Specialists describes its systems as providing 4K cameras, remote monitoring and expert support, with durable equipment suited to project conditions. When selecting a system, confirm the intended image quality, capture schedule, viewing access, storage arrangements and support model before installation.
Drones, sensors and aerial inspections
Drones can show the relationship between work areas, stockpiles, temporary access routes and the wider project environment. They are particularly useful where ground-level views are blocked or where a large site needs to be reviewed efficiently. Flights still require planning around safety, permissions, weather and the people responsible for interpreting the imagery.
Sensors can add information that a camera cannot provide, such as environmental or equipment data, depending on the system selected. Avoid collecting data simply because it is available. Each sensor should have a defined owner, a useful threshold and a response process for readings that fall outside expectations.
Cloud-based project management platforms
A cloud platform can bring images, reports, tasks and approvals into a shared workspace. That makes it easier to locate evidence, assign follow-up actions and maintain a consistent record across office and site teams. Access should be organised around roles, so a client can see appropriate project information without automatically receiving every internal document.
Visual records are most useful when they sit alongside programme information and written observations. A progress image can show what changed, but the accompanying note should explain the location, date, relevant activity and any decision that followed. This is where remote progress visibility can support clearer stakeholder updates without turning the platform into an unmanaged archive.
Connectivity, power and device durability
A remote system is only useful when it can capture and transmit information in the conditions where it is installed. Check cellular coverage, available power, backup arrangements, data allowances and the effect of dust, rain, vibration or temporary structures. Equipment may also need to be moved as the project develops.
Plan a maintenance routine before the first image is captured. It should cover lens cleaning, mounting checks, battery or power inspections, firmware updates and a process for reporting faults. A short test period can reveal weak signal areas and poor framing while changes are still inexpensive.
Setting up an effective monitoring system
Good setup begins with decisions, not devices. The project team should agree what it wants to know, how often it needs to know it and what happens when the information shows a problem. Clear ownership prevents a common failure mode: everyone can view the data, but no one is expected to act on it.
Defining project goals and key performance indicators
Start with a small set of practical questions. These might include whether a milestone is on schedule, whether a restricted area is being accessed correctly, whether a quality hold point has been completed or whether stakeholders are receiving consistent updates. Each question should have a measurable indicator and a person responsible for reviewing it.
Useful indicators are specific enough to guide action. “Improve visibility” is a useful aim but a weak measure; “issue a verified visual progress update each fortnight” gives the team a routine it can test. Goals should also be reviewed when the project moves from excavation to structure, fit-out or commissioning.
Mapping critical areas and monitoring points
Walk through the site and mark the places where visibility will influence a decision. These may include major work fronts, material storage areas, entry points, temporary works and interfaces between trades. Consider the camera’s field of view, changing elevations, lighting and any area that should not be recorded.
A simple monitoring map can show the device location, coverage, power source, connectivity route and inspection responsibility. Keep a record of why each position was selected. That makes later relocation easier and helps explain gaps in the visual record.
Establishing access permissions and data ownership
Decide who owns the images, reports and associated project data before the system goes live. Define who can view, download, edit, share or delete information, and set retention periods that match contractual and regulatory needs. Contractors may need access to specific material without receiving unrestricted access to the whole project archive.
Permissions should be reviewed when staff, contractors or consultants change. Use strong authentication and maintain a record of access where the platform supports it. A clear ownership model also helps resolve questions about whether footage is being used for progress reporting, safety review, security or dispute documentation.
Integrating monitoring tools with existing workflows
Monitoring should fit the project’s established meeting, reporting and issue-management routines. For example, a weekly coordination meeting might review selected imagery against the programme, while a safety meeting might examine a separate set of observations and actions. The system should reduce duplication rather than create another report that nobody reads.
A useful integration has a defined hand-off: capture, review, decision, assignment and close-out. Test that sequence with a minor issue before relying on it for a critical milestone. The progress tracking approach is a helpful reference point for defining evidence, responsibilities and consistent reporting methods.
Using remote monitoring to improve safety
Remote monitoring can strengthen safety awareness by extending the visibility between site visits. It may help teams notice changing conditions, review access to sensitive areas and preserve evidence after an event. It does not replace risk assessments, supervision, toolbox talks or the obligation to control hazards at the workplace.
Identifying hazards before incidents occur
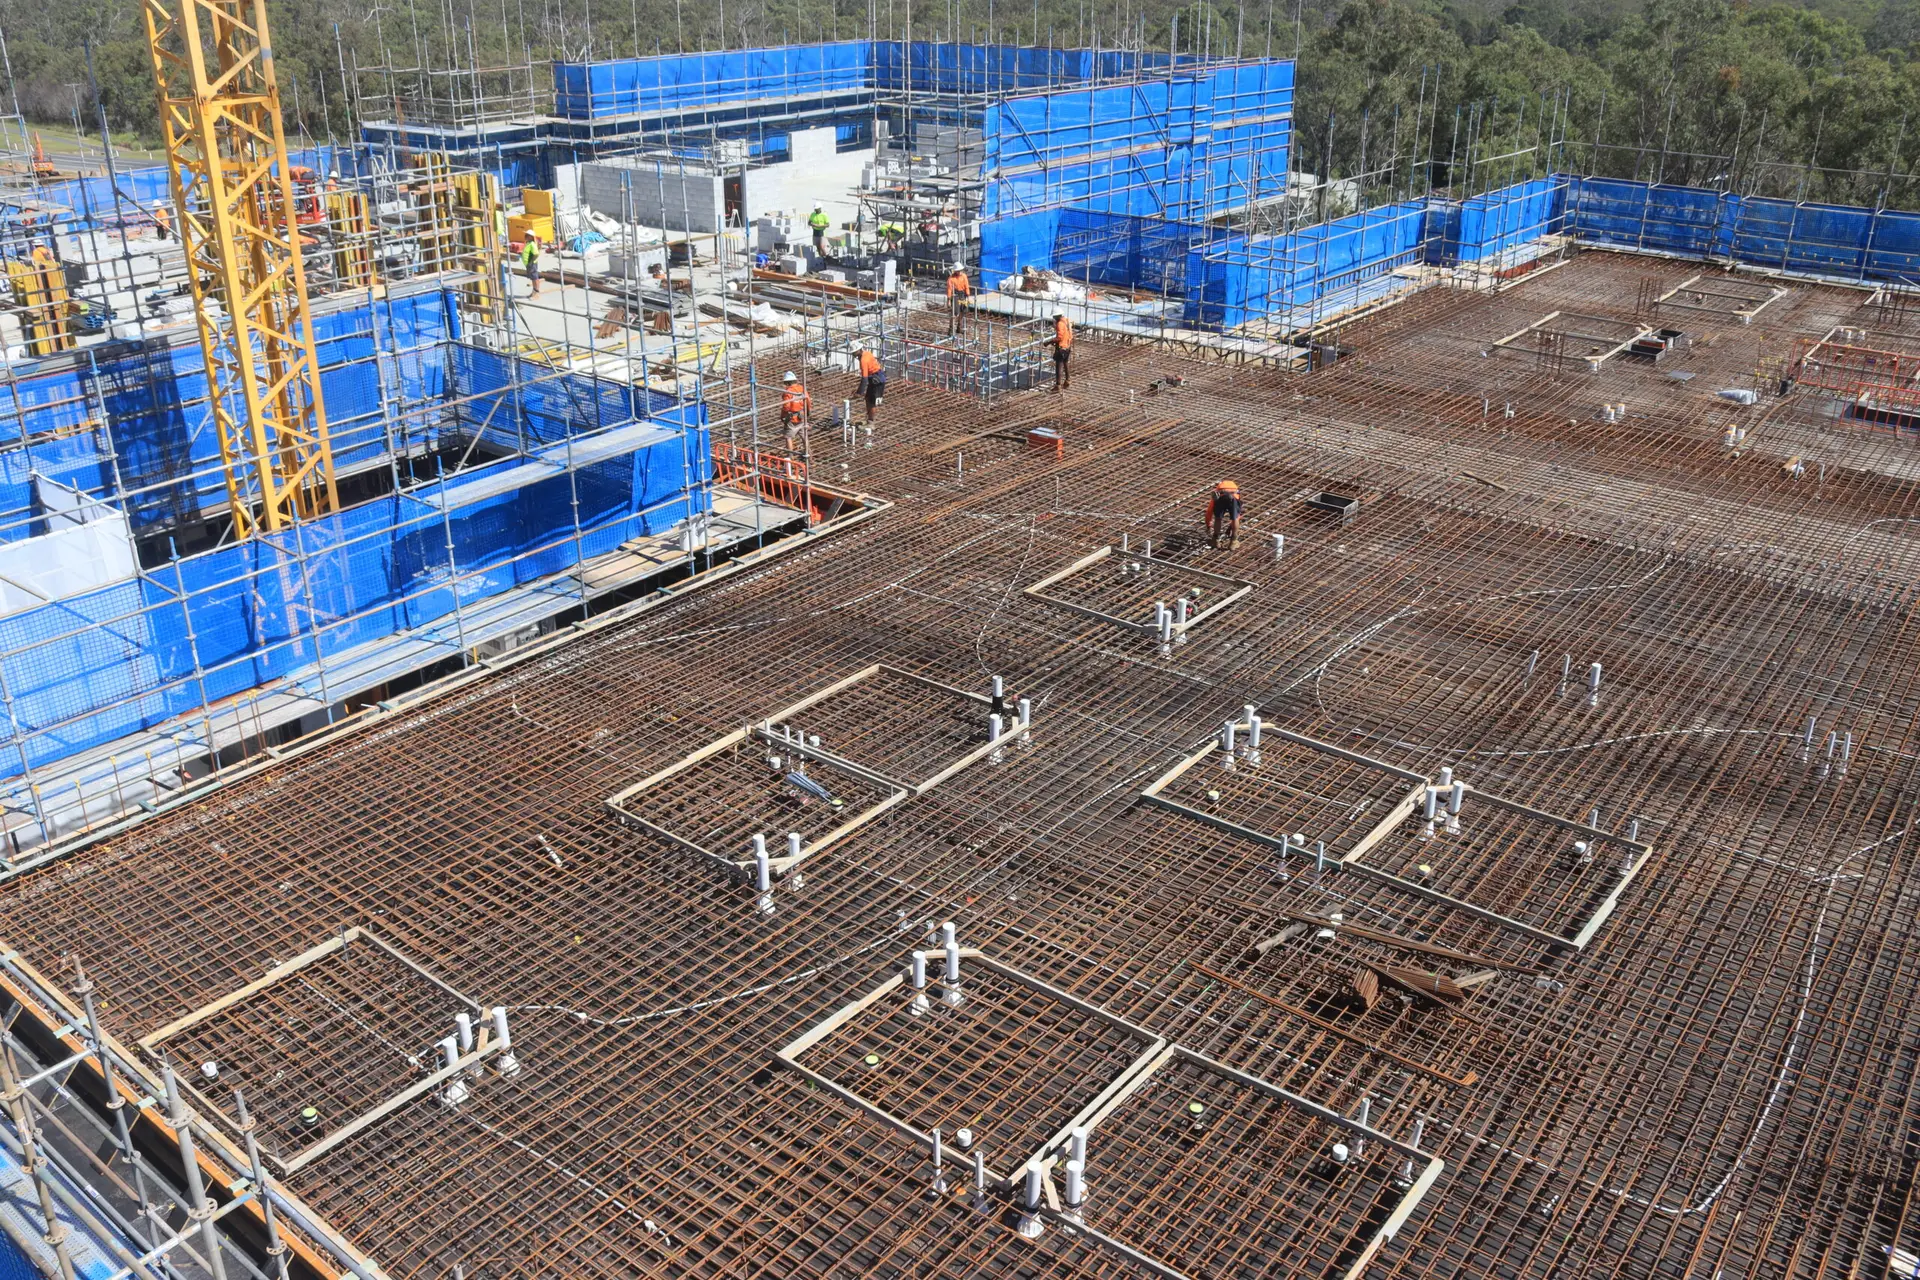
Regular images can reveal blocked access routes, changing storage arrangements, incomplete barriers or work areas becoming congested. The value lies in making an observation early enough for a responsible person to verify it and take action. Images should be treated as prompts for inspection, not as proof that every safety condition is understood.
Set a review rhythm that suits the risk. High-risk changes may need immediate checks, while general housekeeping can be reviewed during a scheduled coordination process. Record the observation, location, action owner and close-out evidence so the system contributes to a defensible safety trail.
Monitoring restricted and high-risk areas
Cameras can provide visibility of locations that are difficult or unsafe to visit frequently, such as deep excavations, elevated work fronts or controlled access points. Positioning must avoid blind confidence: a camera may not show conditions outside its frame, behind an obstruction or during poor light.
Access alerts or scheduled reviews can support the site’s existing controls. They should be linked to a response procedure that explains who verifies the situation and what action is available. A remote operator should never be expected to manage an urgent hazard without suitable site support.
Supporting compliance and incident investigations
Consistent imagery can help demonstrate that inspections and activities occurred at particular stages of a project. After an incident, time-stamped footage may help establish sequence and context, provided it has been stored securely and its limitations are understood. Written statements, site records and physical inspections remain important sources of evidence.
Teams should define how footage is preserved when an event occurs. That may include restricting deletion, recording who accessed the material and exporting relevant files in an agreed format. A visual record is more credible when its capture method and chain of handling are clear.
Balancing surveillance with worker privacy
Workers and visitors should understand where cameras are positioned, why images are collected and how the information will be used. Avoid areas where recording would be disproportionate, and consider masking or repositioning views that capture private spaces. Signage, induction material and a contact point for questions can make the arrangement more transparent.
Privacy requirements vary by jurisdiction and project arrangement, so obtain appropriate advice rather than relying on a generic camera policy. Restrict access to footage, retain it only as long as justified and avoid using progress imagery for unrelated purposes without a clear basis.
Improving productivity and project oversight
Remote monitoring supports productivity when it helps the team identify the next decision sooner. It can show whether a work front has opened, whether materials have arrived or whether a subcontractor’s activity aligns with the programme. It should not be used to infer productivity from a single image or to replace direct conversations about resources and constraints.
Tracking progress against plans and schedules
Set visual milestones that can be recognised consistently, such as slab pours, structural levels, service installation or road formation stages. Compare dated images with the baseline programme and written updates, noting both progress and reasons for variance. This creates a more useful record than a collection of attractive photographs.
The timing of capture matters. Too few images can leave gaps around important changes; too many can create review fatigue. Agree on a schedule that reflects the pace of the work and the reporting needs of clients, lenders or project leadership.
Verifying work quality remotely
Imagery can support a preliminary check of whether work appears complete, accessible or ready for a closer inspection. It is less suitable for confirming hidden workmanship, tolerances or details that cannot be resolved at the available distance. The reviewer should always state what the image can and cannot establish.
High-resolution photographs taken from appropriate angles can help teams compare conditions over time. Where a concern is visible, assign a physical inspection rather than accepting remote evidence as final approval. This distinction protects both quality and accountability.
Coordinating contractors and subcontractors
Shared visual information gives different parties a common reference for meetings and coordination. A project manager can point to a location, date and work front rather than relying on vague descriptions. That can reduce misunderstandings, particularly when teams are working across separate areas or shifts.
Use an agreed naming convention and location structure for images. Link observations to actions, drawings or meeting minutes where appropriate. A consistent record makes it easier to see whether a coordination issue has been resolved or simply moved out of view.
Reducing unnecessary site visits and delays
Remote visibility can help stakeholders decide whether a visit is necessary and what preparation it requires. That may save travel time and allow a specialist to review a condition before arriving. The benefit is greatest when the system is trusted, current and connected to a clear decision process.
Remote access should never become an excuse to postpone a required inspection. A practical rule is to use imagery for screening and preparation, then send the right person to site when the risk, contract or technical question demands physical verification.
Managing costs, risks and implementation challenges
The cost of remote monitoring includes more than the device. Teams need to consider installation, connectivity, storage, maintenance, image review, training and eventual removal. A modest system that is well managed may be more useful than a complex one that produces information nobody can interpret.
Comparing upfront and ongoing technology costs
Prepare a whole-of-project estimate rather than comparing purchase prices alone. Include mounting, power, data, software access, support, relocation, repairs and the time required to review outputs. Hire or managed services may suit projects that need a turnkey setup or only require monitoring for part of the construction period.
The cost decision should reflect the consequence of poor visibility. If a missing record could complicate a claim, delay a decision or require repeated travel, reliable visual documentation may justify a higher operating cost. Even then, the scope should remain proportionate to the project’s needs.
Handling poor connectivity and equipment failures
Construction sites change quickly, and a signal that works during early earthworks may be obstructed once structures rise. Test the connection at the proposed mounting point and keep a fallback process for periods when remote transmission is unavailable. Local storage, scheduled uploads or manual checks may help preserve continuity, depending on the equipment.
Create a fault response path with target times and named contacts. Keep spare mounting hardware and document the camera settings so a replacement can be configured without guesswork. Review gaps in the record rather than quietly treating them as if the system had been operating normally.
Protecting footage, data and site systems
Limit access to the minimum needed for each role and use secure transmission and storage arrangements. Apply updates, protect administrator accounts and separate monitoring equipment from critical project systems where practicable. Be cautious when downloading footage to personal devices or sharing files through informal channels.
Data protection also includes physical security. Mount equipment so it is not easily damaged or tampered with, and record who can access power, network and storage components. A written incident process should cover both lost footage and unauthorised access.
Training teams to act on monitoring insights
Training should cover more than logging into a portal. Users need to know what to review, how to interpret limitations, when to escalate an issue and how to record the resulting action. Site teams should understand that remote monitoring supports their work rather than turning every image into a performance judgement.
A short operating guide can cover the essentials:
- the purpose and coverage of each camera or data source;
- the review schedule and responsible person;
- the process for raising and closing an issue;
- privacy, access and information-handling requirements.
After training, test the process with a realistic scenario and ask users where it feels slow or unclear. Small improvements to roles and notifications often produce more value than adding another device.
Measuring the success of remote monitoring
Success should be judged by better decisions and project outcomes, not by the number of images collected. Establish a baseline before installation so the team can compare travel, reporting effort, response times and record quality. The measures should be simple enough to review throughout the project.
Selecting meaningful operational KPIs
Useful KPIs may include the percentage of planned updates completed on time, the time between an observation and an assigned action, the number of unresolved monitoring faults, or the proportion of key milestones supported by suitable evidence. Choose measures that the team can influence and that relate to a defined project objective.
Avoid measuring activity for its own sake. A high number of logins does not prove that decisions improved, and a large image archive does not prove that records are complete. Pair usage measures with outcome measures wherever possible.
Assessing safety, quality and schedule outcomes
Review whether the system helped identify hazards earlier, prepare more targeted inspections or resolve coordination issues sooner. Compare the monitoring record with safety observations, quality reports and programme updates, while recognising that many factors influence those outcomes. Avoid claiming that a camera alone caused an improvement.
A regular review can ask whether the images were timely, clear and relevant, whether responsible people acted on them, and whether any important condition remained outside the system’s view. This keeps evaluation grounded in the actual project rather than in assumptions about technology.
Calculating return on investment
A practical return calculation can include avoided travel, reduced reporting effort, earlier issue identification, better access to evidence and the value of a reliable project record. Set those benefits against equipment, connectivity, support, storage and staff time. Some benefits, such as clearer stakeholder communication, may be difficult to express in dollars but still matter commercially.
Use conservative assumptions and identify which benefits are estimates. A single avoided dispute or unnecessary trip should not be presented as a guaranteed result. The calculation is most useful as a decision tool for improving the system and selecting the right level of service.
Refining the system throughout the project lifecycle
Review the arrangement at major stage changes, not only at project close. Reposition cameras when views become obstructed, update access when teams change and adjust capture schedules when the pace of work shifts. New risks may emerge as the project moves from structure to services, finishes or handover.
At completion, archive the records according to the project’s requirements and document what worked. The lessons may inform the next project’s camera map, privacy process, reporting rhythm and cost estimate. Remote monitoring becomes more valuable when each project improves the next one.
Conclusion
Remote construction site monitoring is most effective when it combines suitable visual tools with clear objectives, disciplined review and responsible action. For a tailored approach, plan your project with Construction Time Lapse Specialists and consider how time-lapse cameras, drone imaging and high-resolution photography can support visibility from mobilisation through to completion.