Key Takeaways
A successful construction site time lapse starts with a clear purpose and continues with disciplined planning, reliable equipment and regular checks.
- Define the audience, milestones and intended use before installing anything.
- Choose equipment that suits the project duration, site conditions, power and connectivity.
- Position the camera for a stable, meaningful view of progress.
- Test capture settings and maintain a clear process for storage and backups.
- Edit and share the finished footage according to each audience and channel.
Define the purpose and scope of your construction site time lapse
A time lapse is most useful when it has a job to do. It may document progress for the project team, support reporting, provide material for marketing or create a lasting record of the build. Decide this early, because the purpose affects the camera position, capture schedule, storage plan and final edit.
The project scope should also reflect the site itself. A compact commercial build may need one carefully positioned camera, while a civil or infrastructure project could require several viewpoints. A useful construction time lapse guide can help you work through goals, equipment, installation and recording requirements before committing to a setup.
Set clear goals for documentation, marketing or reporting
Start by writing down what the footage must prove or communicate. Project managers may need a consistent record of progress, while clients may want clear updates that show how work is advancing between meetings. Marketing footage usually needs a stronger visual narrative, but it still depends on accurate and uninterrupted capture.
Keep the objective practical. If the footage will support reporting, prioritise a stable viewpoint and dependable intervals over dramatic movement. If it will be used publicly, plan for clean framing, suitable permissions and enough visual variety to make the finished sequence engaging.
Choose the project stages and milestones to capture
List the stages that will change the appearance of the site: demolition, excavation, foundations, structural work, enclosure, services, landscaping and handover. Not every stage needs the same level of coverage, and some milestones can happen quickly, so coordinate the recording plan with the construction programme.
Include events that are easy to miss in a broad schedule, such as a major concrete pour or the arrival of a crane. Marking these dates in advance makes it easier to check the footage later and add meaningful labels during editing.
Identify who will view and use the finished footage
The audience determines how much explanation the final video needs. A site team may value dates and precise progress, whereas a client presentation may benefit from a shorter, polished sequence. Government clients, consultants and project partners may need a factual record that can be reviewed without relying on someone’s memory.
Make a simple audience list and note the preferred format, viewing device and level of detail for each group. This avoids creating one long video that serves nobody particularly well, and it gives the editor a clear brief from the beginning.
Establish the required filming duration and final video length
A long project does not automatically require a long final video. Decide whether you need weekly clips, milestone updates, a monthly summary or one end-of-project film. Then work backwards from the desired duration to estimate how often images must be captured.
Allow for delays, changed completion dates and periods when the site is inactive. Keeping the camera operating beyond the original target can preserve continuity, but only if power, storage and maintenance have been planned for the additional time.
Choose the right camera and time-lapse equipment
Equipment should be selected around the site rather than around a camera specification sheet. Consider exposure to rain, dust, vibration, heat, theft and changing layouts, as well as the distance to power and network connections. The right system is one that can keep producing usable images for the full recording period.
Construction Time Lapse Specialists provides 4K cameras, drone imaging and high-resolution photography for visual monitoring, but the best combination still depends on the project brief. A camera system should be assessed alongside its mounting, enclosure, power, storage and support arrangements.
Compare dedicated time-lapse cameras with standard cameras
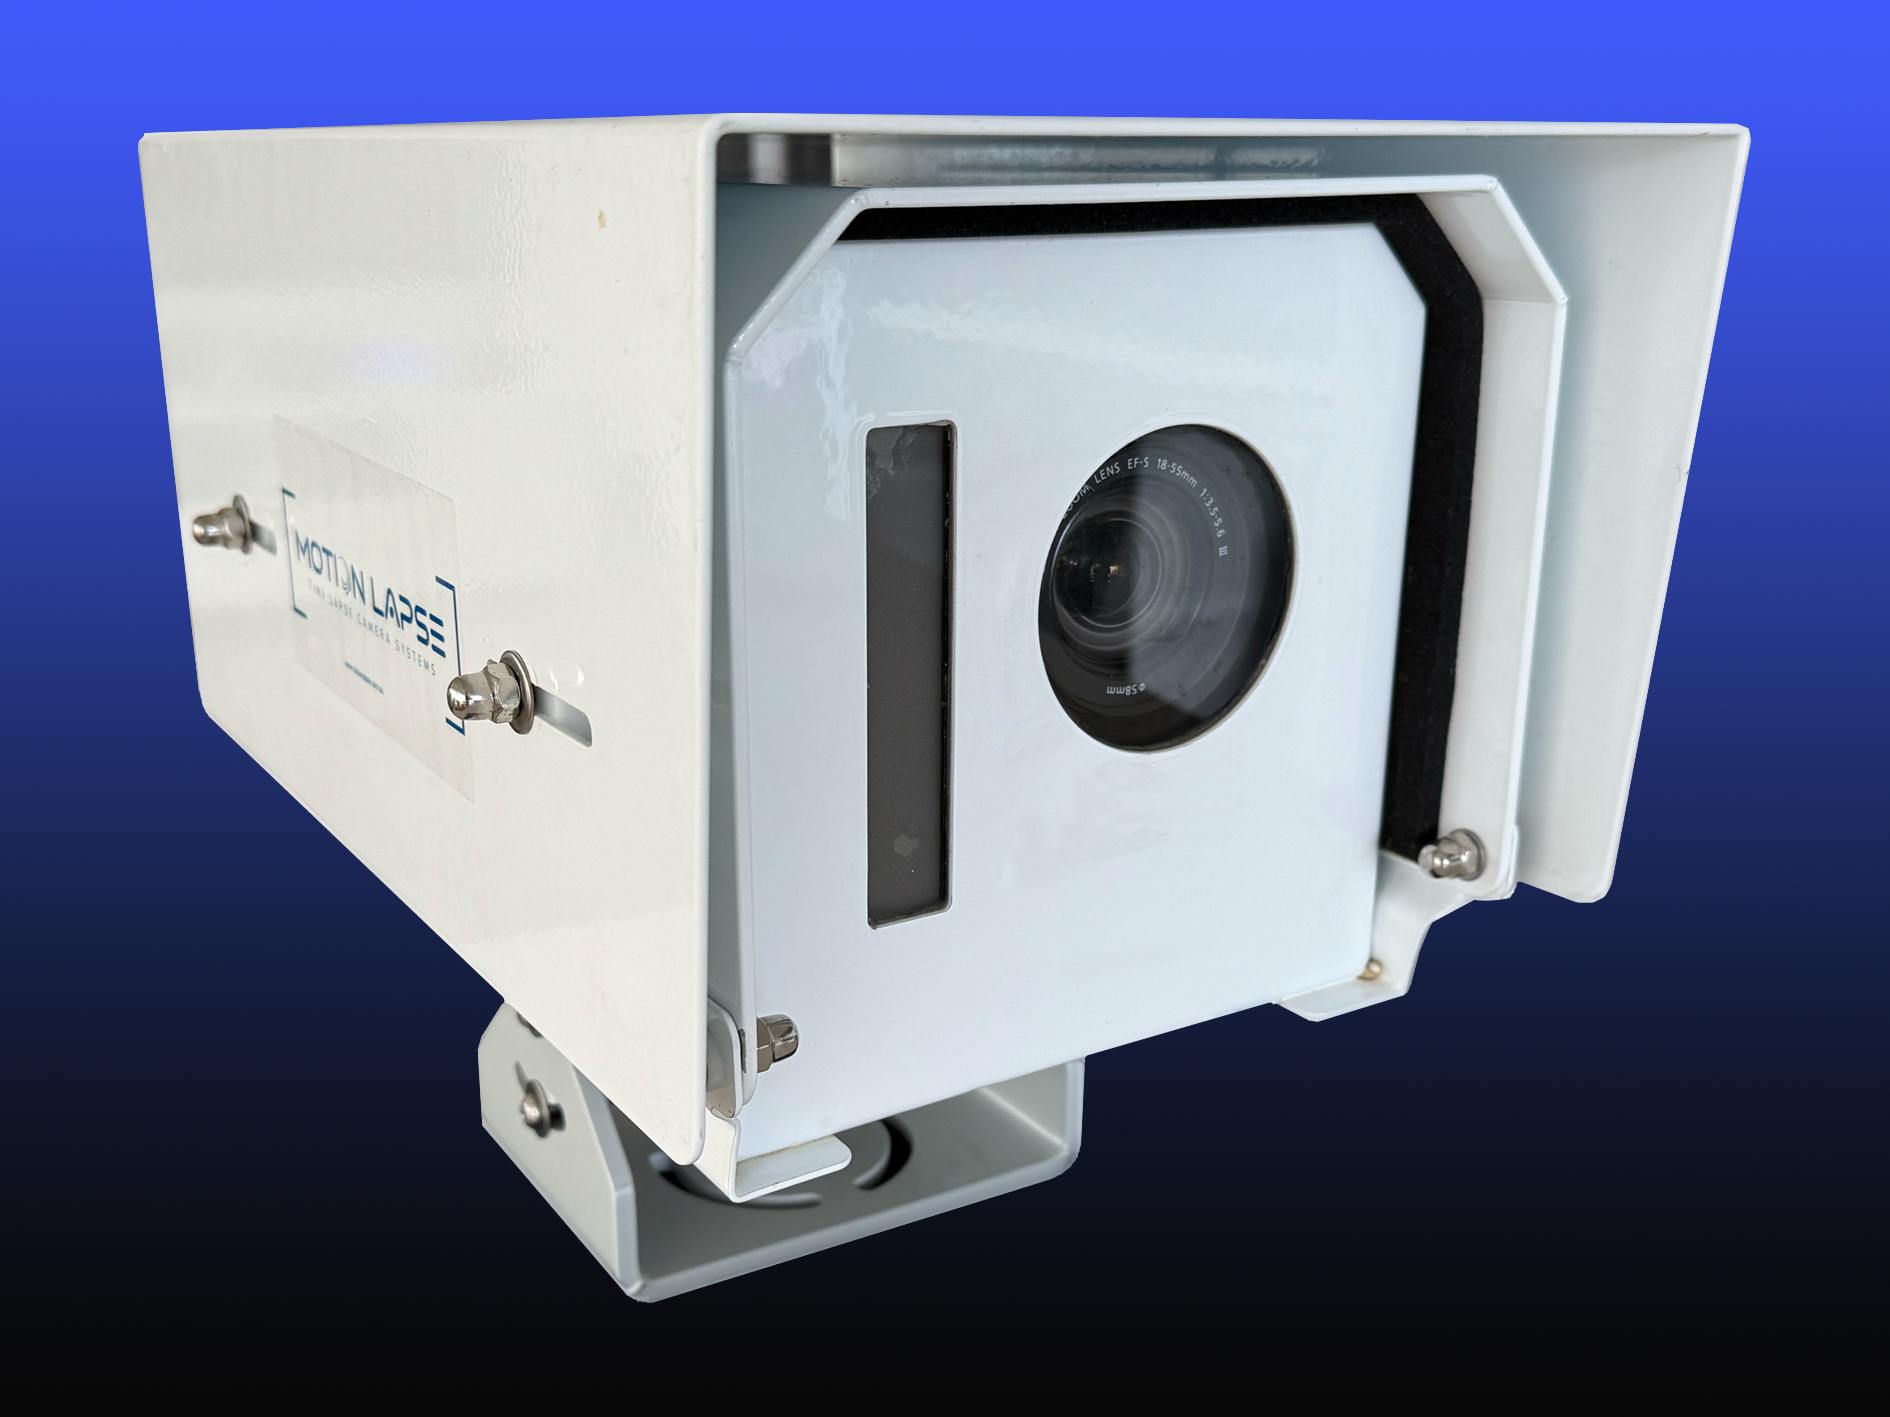
A dedicated time-lapse camera is designed to capture images at scheduled intervals over an extended period. It can be a sensible choice when the camera will remain on site for months and needs a durable installation with predictable operation.
A standard camera may offer more manual control or interchangeable lenses, but it can require more attention to batteries, storage and weather protection. Compare the complete system, not just the camera body: enclosure, mounting, remote access and maintenance can matter more than a single headline specification.
Select image quality, storage and connectivity features
Choose image quality that will remain clear when the footage is shown on a large screen or cropped for a report. Storage calculations should account for the capture interval, image size, recording duration and any duplicate or backup files.
Connectivity is equally important when the site is difficult to visit. Secure remote portal access can allow authorised stakeholders to view progress from elsewhere, while a system with no dependable connection may need a more deliberate inspection and file-retrieval routine.
Plan for weatherproofing, power and remote monitoring
The installation should be rated and protected for the conditions it will face, including wind-driven rain, dust and direct sun. Power planning needs to cover the full recording period, with a contingency for outages or delays to the electrical works.
Remote monitoring is useful only when someone is assigned to respond to alerts and check the system. Decide who will review connectivity, confirm that images are arriving and escalate a fault before several weeks of progress are lost.
Assess security, mounting and site access requirements
Mount the equipment where it has a stable view but is not exposed to unnecessary interference. A secure bracket, locked enclosure and suitable height can reduce the risk of damage or tampering, while vibration control helps keep the framing consistent.
Access arrangements should be agreed before installation. Include the camera in the site induction process, identify safe routes for maintenance and confirm whether work near the mounting point will later obstruct the view.
Plan the camera position and installation
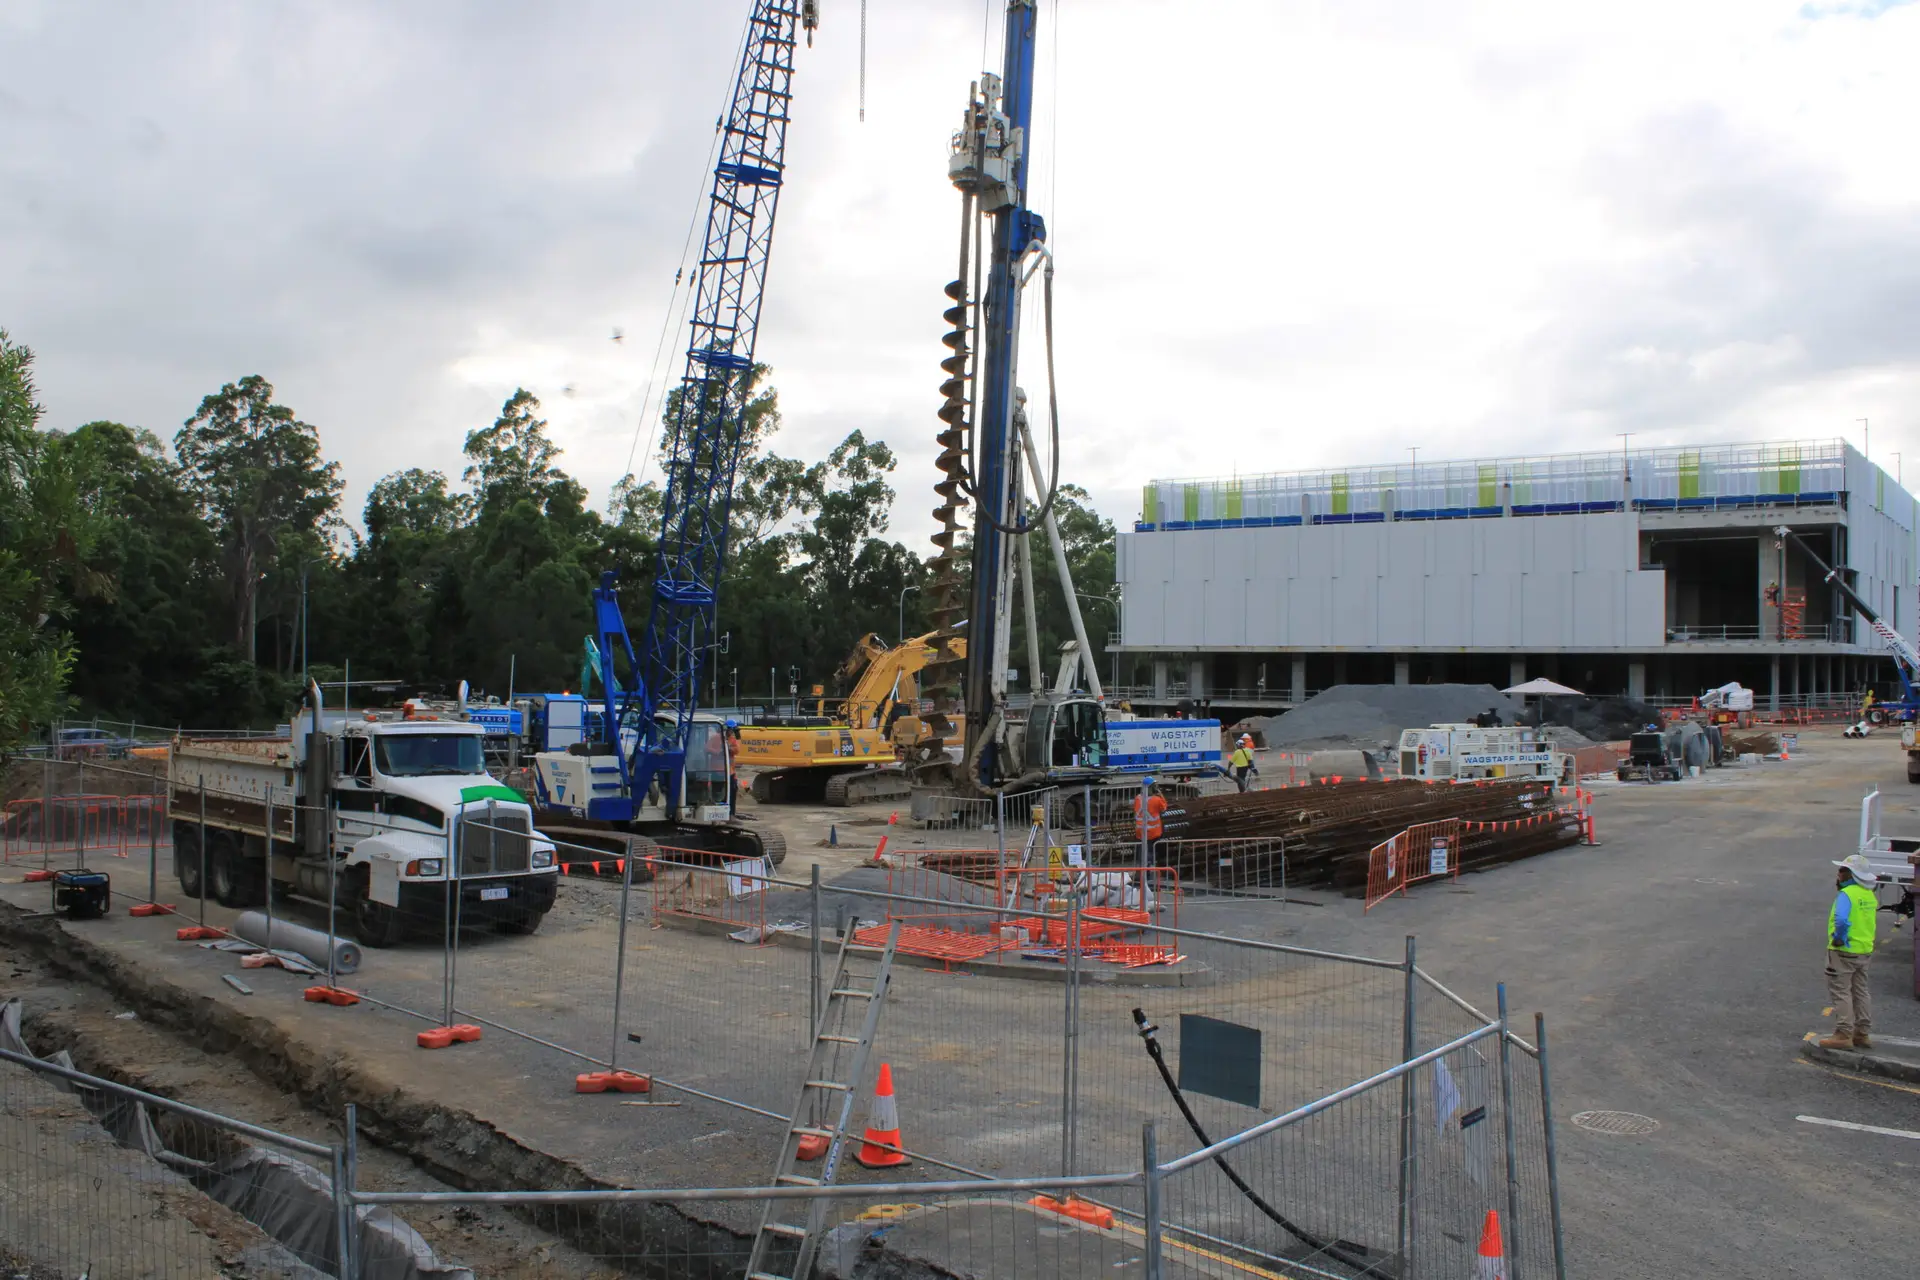
The camera position is difficult to correct after the structure has changed, so treat it as a design decision rather than a quick site task. The view should explain progress clearly, retain useful context and remain stable as plant, hoardings and temporary works move around it. A carefully chosen viewpoint often contributes more to the finished result than expensive editing.
Walk the site at different times of day before fixing the camera. Check glare, shadows, likely crane paths and future obstructions, then discuss the proposed position with the site manager and relevant safety personnel.
Find a viewpoint that shows meaningful progress
Look for a position that includes a recognisable reference point, such as the main structure, access road or neighbouring skyline. The frame should show change over time rather than focusing so tightly on one activity that the wider sequence becomes difficult to understand.
For larger sites, one view may not be enough. A second position can cover an obscured elevation or provide a different perspective, but additional cameras also increase the requirements for power, storage, permissions and maintenance.
Calculate framing, height and coverage before installation
Use a temporary camera or a test photograph to check the proposed field of view. Include enough foreground to show works progressing while leaving headroom for cranes, upper levels or future vertical growth. Mark the intended framing so it can be restored if the camera is disturbed.
Review the image at the same angle and approximate focal length that will be used for the recording. Small framing errors become obvious when hundreds of images are played together, particularly if a building gradually moves out of the centre of the frame.
Protect equipment from weather, dust, theft and vibration
Protection begins with the mounting point. Use a rigid fixing, keep cables tidy and avoid surfaces that transmit movement from machinery or temporary structures. Dust can settle on the lens, while rain and condensation can reduce image quality even when the camera continues to operate.
Plan safe access for cleaning and inspection rather than treating maintenance as an afterthought. A camera that is technically recording but has a dirty lens or shifted frame will not provide a dependable visual record.
Coordinate installation with site managers and safety procedures
Installation must fit the site’s access controls, inductions and work permits. Confirm who can approve the location, when the installation can occur and whether lifting equipment or a temporary closure is required.
Document the final position, cable route and equipment serial details. This gives the project team a reference for later checks and makes it easier to explain the installation to new staff as the build progresses.
Configure reliable image capture in changing conditions
Construction sites change constantly, and the camera must cope with both the schedule and the light. Capture intervals, exposure settings and operating hours should be chosen together rather than adjusted in isolation. The aim is a sequence that is consistent enough to edit while still showing the pace of work.
A short test period is valuable before the system is left unattended. Review images at different times of day, check whether moving equipment is represented clearly and confirm that the files are being stored or transferred as expected.
Choose an appropriate capture interval for the build schedule
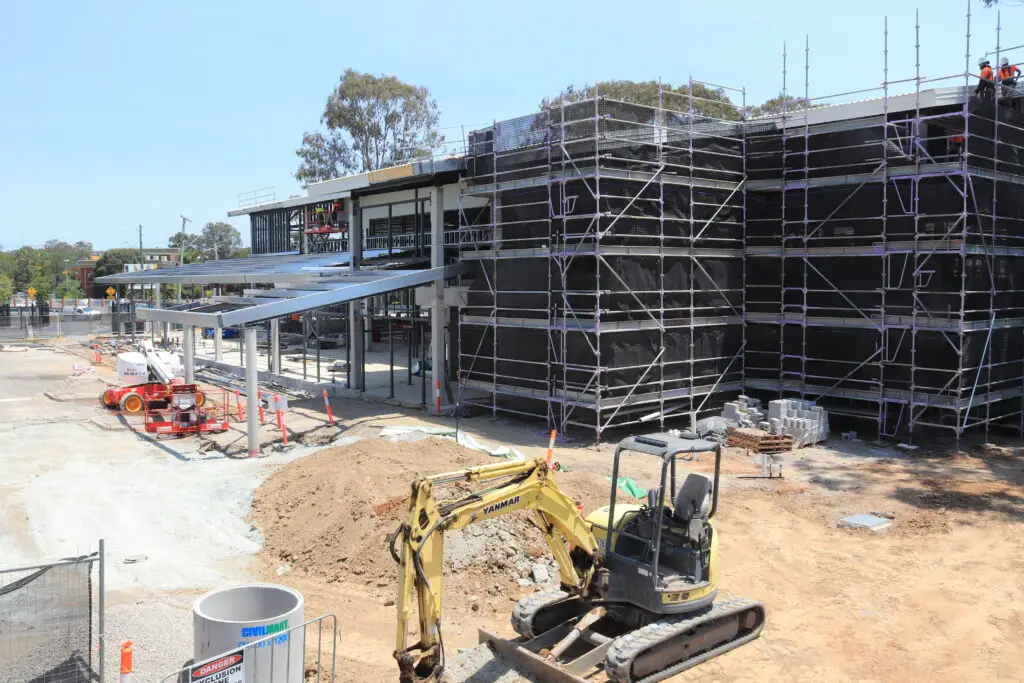
The interval should match how quickly visible change occurs. A long interval may suit a project where progress is gradual, while a shorter interval can better record active earthworks or a concentrated installation phase. Consider working hours as well as calendar days so the final sequence does not contain unnecessary night frames.
Keep the interval consistent unless there is a clear reason to change it. If the schedule changes, record the adjustment so the editor can understand why one section of the footage moves at a different pace.
Set exposure, focus and white balance for consistent footage
Lock focus once the composition is confirmed, particularly if the camera is pointed at a fixed scene. Automatic adjustments can create visible jumps between frames, although some environments may require carefully tested automatic exposure to handle strong changes in brightness.
White balance should also be considered for continuity. Consistent colour makes the building appear to progress naturally, while repeated shifts between warm and cool tones can distract viewers and require more correction later.
Manage daylight changes, shadows and artificial lighting
Sun position, cloud cover and seasonal daylight will alter the appearance of the site. Record a full test day if possible, looking for reflections, deep shadows and glare that could obscure key work areas.
Artificial lighting can produce flicker, especially when lights cycle or operate at a different frequency from the camera. If night capture is not needed, limiting the schedule to suitable daylight hours may produce a cleaner and more efficient sequence.
Test the system before leaving it to operate unattended
Run the complete setup long enough to confirm the camera, power, storage and connection all work together. Review the actual files rather than relying only on a dashboard status, and check that timestamps are correct.
Before leaving, confirm the lens is clean, the framing is recorded and the responsible contact knows how to report a fault. A short commissioning checklist can prevent a small configuration error from becoming a permanent gap in the project record.
Manage data, power and ongoing site monitoring
Long-term capture is an operational task, not a set-and-forget exercise. Someone needs responsibility for power, storage, access, maintenance and fault response throughout the build. Clear ownership is especially important when the project changes hands between contractors or reaches a quieter stage.
Construction Time Lapse Specialists uses durable systems and secure remote portal access to support viewing of site progress, but the project team should still agree how often the footage will be reviewed and who can make changes to the setup. A reliable process protects the value of the images as the schedule develops.
Estimate storage requirements for long-term recording
Estimate storage from the number of images, their file size and the planned duration, then add room for extensions and backups. Keep a record of the capture interval because even a small change can significantly increase the number of files over many months.
A simple planning table helps compare the main variables before installation:
| Recording choice | Effect on storage | Planning consideration |
|---|---|---|
| Shorter capture interval | More images and faster storage growth | Useful for rapidly changing work |
| Higher image resolution | Larger individual files | Allow space for editing and archiving |
| Longer project duration | More total files | Include programme extensions |
| Duplicate backup copy | Additional storage allocation | Protects against local failure |
The table is a planning aid rather than a fixed formula. Confirm actual file sizes during testing, and make sure the chosen storage method can be accessed by the people who need the record.
Use mains power, batteries or solar options effectively
Mains power is usually convenient once a reliable connection is available, but early works may require another approach. Batteries or solar options can support remote locations, provided their capacity is matched to weather, operating hours and maintenance access.
Build in an outage response. A backup battery, surge protection or scheduled inspection may be appropriate depending on the site, while every cable and connection should be protected from plant, water and accidental disturbance.
Schedule inspections, maintenance and equipment checks
Inspections should follow the project risk and the environment, not just the calendar. Check the lens, enclosure, mount, cables, power and connection, and compare the current frame with the approved reference image.
Keep a brief maintenance log with dates, observations and actions. This makes faults easier to trace and provides useful evidence that the equipment was being managed during a long recording period.
Back up images and monitor connectivity or system faults
Backups should be automatic where possible, but automation still needs oversight. Confirm that files are arriving, timestamps remain correct and the remote view reflects current site conditions rather than an old cached image.
If the system reports a connection or power fault, respond quickly and record the interruption. The project footage archive can help establish a consistent approach to organising material, but each project should also define its own retention and access rules.
Turn construction images into a professional time-lapse video
Editing turns a technical record into a story that people can understand quickly. The strongest sequence still depends on the quality and continuity of the original capture, so post-production should improve the record rather than disguise gaps in it. Keep the project purpose and audience visible throughout the edit.
Organise the footage before making creative decisions. Use dates, camera positions and milestone notes to build a sequence that can be reviewed by both the project team and the eventual audience.
Organise files and remove unusable frames
Create a consistent folder structure for dates, cameras and project stages. Remove frames that are blank, severely obstructed or affected by a known fault, but preserve the original material separately so the edit remains traceable.
Watch for subtle problems such as a shifted camera, a dirty lens or repeated frames. These issues may not be obvious in a file list but can make the finished video appear to jump or stall.
Correct flicker, exposure changes and inconsistent colour
Use post-production tools to smooth changes that arise from daylight, artificial lighting or automatic camera adjustments. Correct colour carefully so concrete, steel and surrounding landscape remain believable rather than becoming artificially uniform.
Do not over-process the footage. A clear, honest visual record is generally more useful to a project team than an edit that removes every natural variation from the site.
Add transitions, dates, labels and project milestones
Labels should orient the viewer without crowding the frame. Dates, stage names and brief milestone descriptions can make a long build easier to follow, especially for people who were not present on site.
Use transitions sparingly and keep their style consistent. A simple progression from excavation to handover often communicates more effectively than a sequence filled with decorative effects.
Select music, voice-over and branding for the intended audience
Music should support the pace and tone of the project without overpowering site sounds or spoken explanation. A voice-over can add context for a public presentation, while a client update may work better with concise labels and a restrained soundtrack.
Keep branding accurate and proportionate. Include the project name, relevant contributors and approved logos only after permissions have been confirmed, and export versions suited to the people who will actually watch them.
Share and measure the impact of the finished footage
A finished video has more value when it is easy to access and clearly connected to the project’s objectives. Prepare different versions for a website, a presentation, a client update or a social channel rather than forcing every audience to use the same file. The construction progress video guide offers a useful perspective on using footage for promotion, collaboration and project records.
Construction Time Lapse Specialists can combine construction time lapse systems with 4K cameras, drone imaging and high-resolution photography where a project needs more than one visual perspective. Whatever the source material, sharing should respect site privacy, approvals and the intended purpose of the record.
Adapt the video for websites, social media and presentations
Export the correct aspect ratio, resolution and length for each destination. A presentation may need a wide, detailed film, while a social post may need a shorter cut that communicates the milestone in the opening seconds.
Keep a high-quality master file and create compressed copies for distribution. Naming each version clearly reduces the chance of an outdated or incorrectly branded edit being published.
Use progress footage in client updates and project reports
A short sequence can give a client a clear sense of movement between formal reports. Pair the footage with dates, milestone notes and a concise explanation of any pauses or changes in the programme.
For internal reviews, use the record to prompt useful questions about sequencing, access and delays. It should support professional judgement, not replace site inspections, drawings or contractual documentation.
Protect privacy, permissions and intellectual property
Review the frame for workers, visitors, neighbouring properties, vehicle registrations and sensitive documents before public release. Establish who owns the raw images, who can approve edits and how long material will be retained.
Permission should cover the intended use, not just the act of filming. Store approval records with the project files and restrict remote access to authorised users.
Track engagement and improve future construction documentation
Measure views, completion rates, downloads or feedback according to the purpose of the video. A marketing cut may be judged by audience response, while a project update may be judged by whether stakeholders found it clear and timely.
Use that feedback to improve the next installation. A free site consultation can help teams discuss the location, project objectives and practical requirements before recording begins. Keep notes on what worked, what caused gaps and which viewpoints made progress easiest to understand.
Get Your Project on Record
For a dependable construction site time lapse, speak with Construction Time Lapse Specialists about a suitable camera installation, visual monitoring approach and support plan for your project.
Conclusion
A construction site time lapse is most effective when its purpose, viewpoint, equipment, operating plan and final audience are considered together. With careful installation, regular monitoring and thoughtful editing, months of work can become a clear visual record that supports communication, reporting and project history.