Key Takeaways
A useful time lapse setup starts with the project decisions you need it to support, not simply the camera specification. Plan for the site, the people who need access, and what happens to the images at project close-out.
- Match image quality, viewpoints and capture intervals to the project’s reporting and communication needs.
- Check mounting locations, power, connectivity and maintenance before installation.
- Agree on image access, privacy, retention and export arrangements in advance.
- Compare the full cost of equipment, installation, connectivity and ongoing service.
- Define support, deliverables and responsibilities with your provider before work begins.
How time lapse cameras support commercial construction projects
A camera system can give you a consistent visual record of a build, from early works through to completion. That record can help project teams communicate progress to clients and stakeholders who are not on site every day. For commercial construction time lapse cameras Australia projects, begin by deciding which views and milestones will make the footage useful, rather than treating capture as an end in itself.
Documenting progress for clients and stakeholders
Regular images let you show changes that can be hard to convey in a written update, particularly across a long project. Construction Time Lapse Specialists provides visual monitoring services and secure remote portal access for viewing site progress, giving project stakeholders a way to review imagery without relying on occasional site visits. Consider who needs to see the images, how often they need updates, and whether the selected camera views make those updates clear.
Comparing planned schedules with on-site work
A visual record can support conversations about what has changed on site over time. It does not replace your programme, site diary or formal reporting, but it can give a team useful context when reviewing a milestone or investigating a delay. Compare imagery from consistent viewpoints and dates, and record the relevant project context separately so that images are not asked to explain more than they show.
Creating records for reporting and dispute resolution
Images may be useful supporting material when you prepare a progress report or need to revisit the sequence of visible work. Their value depends on clear dates, stable viewpoints and sensible file management. Treat them as one part of the project record, alongside approved documents, meeting notes and other evidence, and confirm any formal recordkeeping requirements with your project team.
Producing project videos for marketing and handover
A sequence of images can also become a concise way to share the story of a completed project. Decide early whether you want regular stakeholder updates, a final video, or both, because editing, branding and delivery requirements can affect the service you choose. If you are planning a broader content package, a production workflow review can help you think through how project footage will fit with other campaign material.
Choosing the right camera system
The right system depends on the site, the length of the project and the way you intend to use its images. A single fixed view may be enough for a compact build, while a complex or wide site can require several viewpoints or a camera that can be moved as work progresses. Compare the whole setup, including image quality, power, storage and access, rather than choosing on resolution alone.

Matching image quality to the project’s goals
Start with the detail you need to see and the distance between the camera and the work. A broad overview can show the shape of a site, while a closer view may be more useful for tracking a particular area; lighting, weather and obstructions also affect what the image can show. Construction Time Lapse Specialists offers 4K cameras and high-resolution photography, so discuss the intended viewing and reporting needs when deciding what image quality is appropriate.
Comparing fixed, portable, and multi-camera setups
A fixed camera provides continuity from one viewpoint, which can make changes easier to review over time. Portable equipment can suit a project where coverage needs to move, while multiple cameras can provide different angles across a large or changing site. A construction time-lapse setup guide is a useful starting point for considering how camera placement, capture schedules, power and connectivity relate to your project.
Assessing power options for long-term deployments
Power planning should account for the expected deployment period and the practicalities of reaching the camera safely. Ask whether the proposed supply is suitable for the mounting location, how interruptions will be handled, and who is responsible for checking it. The answer may differ between a camera near a site office and one mounted high above an active work area, so include access arrangements in the plan.
Choosing between local storage and cloud uploads
Storage choices affect how quickly people can review images and how much ongoing data management the project needs. Ask what is stored on the camera, whether images are uploaded remotely, how often uploads occur and what happens if connectivity drops. The comparison below gives you a simple set of questions to take into a system discussion.
| Consideration | Local storage | Remote or cloud access |
|---|---|---|
| Reviewing images | May require access to the camera or storage media | Can support remote review if the service and connection allow it |
| Connectivity | Less dependent on a continuous upload connection | Depends on suitable connectivity and the service arrangement |
| File handling | Your team may need to retrieve and organise files | Confirm how images are accessed, exported and retained |
| Resilience | Ask how stored images are protected if equipment is damaged | Confirm backup arrangements and what happens during outages |
Neither approach is automatically best for every project. Confirm the storage method, access limits, backup process and export format in writing, then check that the arrangement suits your team’s working practices.
Planning camera placement and installation
A camera position is useful only if it provides a stable, safe view of the work you need to document. Before installation, consider the build sequence, site access rules and likely changes to the surrounding environment. Good planning can reduce the chance that a new structure, temporary works or routine site activity will block the view partway through the project.
Selecting viewpoints that show meaningful progress
Choose a view that captures the project’s important areas without making the main work too small to interpret. A high, wide view may cover a large footprint, while another angle could be needed to show a separate building face or work zone. If your project is in Brisbane, this Brisbane camera-planning guide offers a relevant starting point for thinking through views, schedules and monitoring needs.
Accounting for site access, crane movement, and obstructions
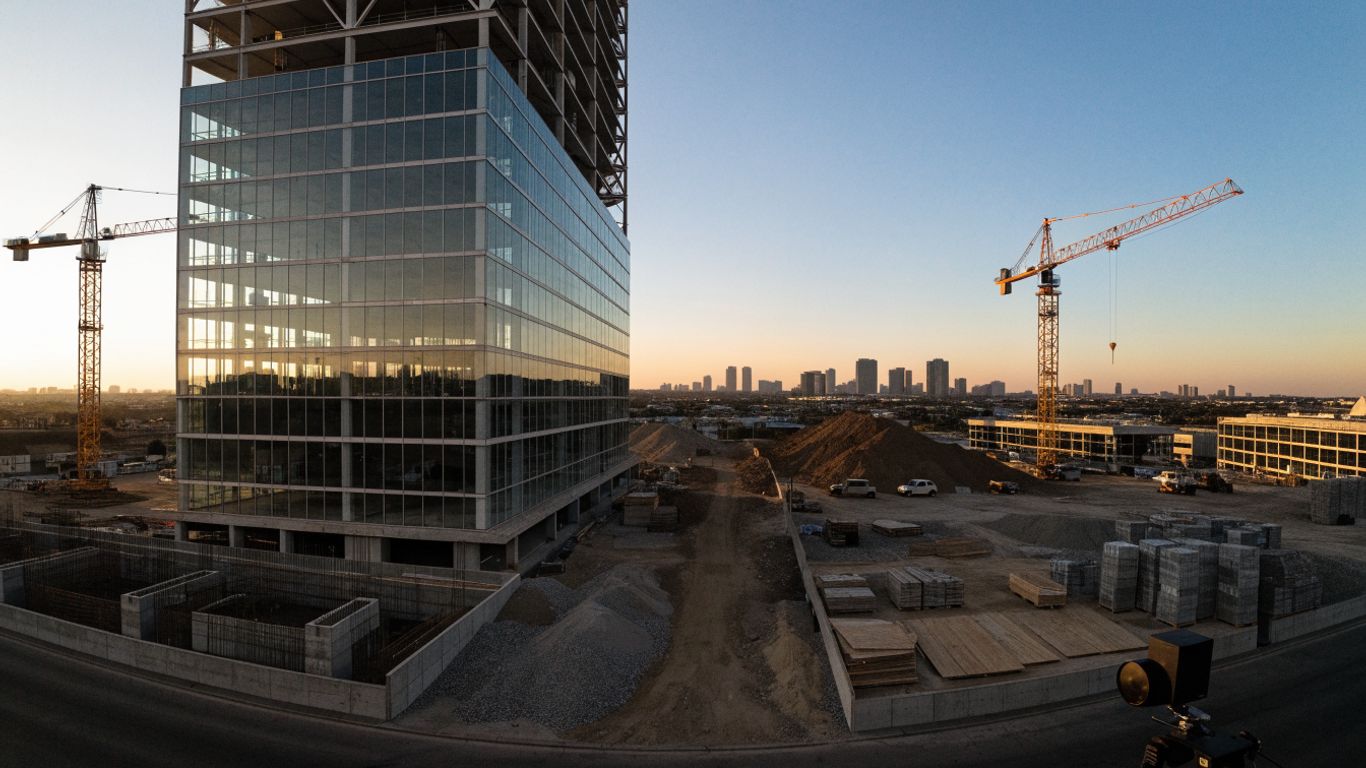
Map the camera’s line of sight against cranes, hoardings, temporary structures and planned changes to the site. Check that the mounting location does not interfere with lifting operations or create a safety issue for workers accessing the area. For a more detailed view-position checklist, use a camera placement guide to frame the questions about height, distance, sunlight, obstructions and access.
Setting capture intervals for different construction phases
The right interval depends on how quickly visible changes are likely to occur and how the images will be reviewed. A slower phase may not need the same frequency as work with rapid, day-to-day movement. Agree on the interval with the project team, and revisit it when the programme changes so the image sequence remains useful rather than simply accumulating files.
Coordinating installation with site managers and contractors
Installation needs to fit the site’s induction, access and work-permit processes. Identify who can approve the position, who will provide safe access, and when the installation team can work without disrupting construction activity. A short coordination plan also helps contractors understand what equipment is being installed and who to contact if the camera position needs to change.
Preparing for Australian site conditions
Australian sites can face a wide range of weather, exposure and connectivity conditions, even within one state. A system that is suitable for a protected urban location may need a different mounting or service plan on a coastal, regional or remote project. Discuss the local conditions with your provider and make durability, safe access and outage response part of the deployment plan.

Choosing equipment for heat, rain, dust, and coastal exposure
Check that the equipment and mounting approach suit the conditions expected at the actual site, including heat, rain, airborne dust and salt exposure near the coast. Ask about the proposed protection, its limits and any inspection requirements. Construction Time Lapse Specialists describes its systems as durable and customised for project needs; confirm how the specific proposed setup will be suited to your location and deployment period.
Protecting cameras from theft, impact, and tampering
Position equipment where it can capture the required view without making it an avoidable hazard or an easy target. Consider secure mounting, access control and the possibility of impact from plant or materials. Include a process for reporting damage or suspected tampering, and decide who can approve a repair or repositioning if the camera is affected.
Checking connectivity across urban, regional, and remote sites
Do not assume that a site’s general mobile coverage will be reliable at the camera position. Check the connection at the proposed mounting point and ask what remote access can offer if uploads are delayed or interrupted. For work across roads, bridges, rail or utilities, a civil project camera guide can help you consider coverage and access across a dispersed project.
Planning maintenance and recovery after outages
Even a well-planned system needs a response plan for power loss, connection problems or equipment damage. Decide how often the camera will be checked, who receives an alert and how access can be arranged safely. Keep a record of outages and any changes to the camera position, so the team understands gaps in the image sequence when reviewing project history.
Managing images, access, and privacy
Images are most useful when people can find the right view and understand who is permitted to use it. Set expectations for access, sharing and retention before the camera goes live, and check them against project policies and relevant obligations. Clear rules also make it easier to share progress without circulating files more widely than intended.
Setting user permissions for project teams and clients
Decide which project roles need to view images and whether some users also need to download or share them. A controlled access list is easier to maintain than a general link passed from person to person. Review permissions when staff or client teams change, and establish a contact who can approve new access requests.
Organizing footage for easy review and sharing
A consistent naming and filing approach helps people locate images by date, camera view or project milestone. Agree on how files will be presented for meetings and reports, and whether the team needs periodic exports in addition to portal access. Keep the method simple enough that it will still be followed during busy phases of work.
Establishing retention and backup procedures
Set a retention period that reflects project requirements and any applicable recordkeeping rules. Confirm who is responsible for backups, how image exports will be delivered and what happens to stored material when the service ends. A visual-record planning guide can help you consider how construction photography and time lapse footage fit within wider site documentation.
Considering privacy when capturing workers and neighboring properties
Plan camera angles to focus on the construction work rather than unnecessarily capturing adjacent homes, public areas or identifiable individuals. Explain the purpose of the system to site teams and follow the project’s privacy and notification procedures. If neighbouring properties or public spaces cannot be kept out of view, seek appropriate advice before installation and document the steps taken to reduce incidental capture.
Evaluating costs and project value
A quote can include more than the camera itself, so compare offers using the same project duration, number of views and service expectations. Consider installation, connectivity, storage, maintenance and the final image or video deliverables. The aim is not simply to find the lowest price; it is to understand what is included and whether it supports the way your team plans to use the record.
Comparing equipment, installation, connectivity, and service fees
Ask each provider to separate one-off and ongoing charges, and clarify whether access, data, maintenance and image delivery are included. Compare equivalent scopes, including camera count and deployment length, rather than comparing headline fees alone. When a proposal includes a managed service, check what work is performed by the provider and what remains with your team.
Estimating the value of reduced site visits and clearer reporting
Remote access may help stakeholders review progress without travelling to the site for every update, but the value depends on how often they would otherwise visit and whether the images answer their questions. Estimate potential savings conservatively, and include the time your staff will spend reviewing and sharing footage. Clear, consistent visual records can also make project discussions more concrete, though they do not remove the need for other reporting evidence.
Accounting for project duration and changes in scope
Longer projects may require ongoing fees, maintenance visits or changes to the camera setup as the site develops. Ask how extensions, relocations and additional viewpoints are priced before work starts. If the programme shifts, agree on how the service period and image delivery dates will be updated rather than assuming the original quote covers every change.
Identifying costs that may be excluded from a quote
A quote may treat access equipment, site inductions, extra installation work or video editing separately, so ask directly about exclusions. This is also a good point to compare service terms beyond the immediate price. For instance, equivalent transport quotes illustrate why scope, credentials, communication and booking terms should be compared together; the same discipline helps when you review camera proposals.
Selecting a provider and defining service expectations
A provider should be able to explain how the proposed system will work on your site and what your team will receive throughout the project. Discuss technical arrangements alongside support, access and end-of-service handover. Construction Time Lapse Specialists combines time lapse systems with drone imaging and high-resolution photography, and provides secure remote portal access; confirm which of these services, if any, are included in the scope you are considering.
Comparing self-managed cameras with managed services
With a self-managed setup, your team may take on more responsibility for checking equipment, retrieving images and maintaining access. A managed service can allocate some of those tasks to a provider, but the exact scope varies. Compare who handles installation, monitoring, maintenance and delivery rather than relying on the label attached to a package.
Checking support, uptime, and replacement arrangements
Ask how faults are reported, what response times are offered and what happens if equipment needs repair or replacement. Confirm whether support is available throughout the project and whether the provider records service interruptions. These details matter most when a camera is difficult to reach or the visual record is being used regularly for project updates.
Confirming image ownership and export options
Agree who owns the captured images, who can access them and how they can be exported at the end of the service. Check the available file formats, any applicable fees and the timeframe for retrieving material after the project ends. For further comparison, read camera selection research with your project’s requirements in mind, then verify any proposed specification directly with your provider.
Agreeing on deliverables, access, and reporting before installation
Write down the expected views, capture schedule, portal users, reporting cadence and final deliverables before equipment is installed. Specify who approves changes and how issues or outages will be communicated. When service comparisons touch on matters as different as a layered care plan, down bedding options or in-home dog training, clear scope and follow-up still help distinguish what is actually included; for a camera project, the agreement should be just as explicit about access, support and image delivery.
Conclusion
A dependable time lapse setup is built around a clear purpose, a suitable site position and an agreed plan for power, connectivity, image access and recordkeeping. Compare providers on the complete service rather than a camera specification alone, and settle responsibilities before installation. With those details in place, your project team can use the images as a practical part of communication and documentation from early works to handover.
Frequently Asked Questions
What should you decide before choosing a construction time lapse camera?
Decide what you need to document, who will use the images, how long the project will run and what deliverables you expect. Those answers help shape the camera count, viewpoints, capture schedule and service scope.
How many cameras does a commercial construction site need?
It depends on the site’s size, layout and important work areas. One camera may provide a useful overview for a compact project, while a large or changing site may need several viewpoints.
How often should a construction camera capture images?
Choose an interval based on the pace of visible work and how the images will be reviewed. Revisit the schedule when the project phase or reporting needs change.
Can you access construction time lapse images remotely?
Remote access depends on the camera service, the agreed access arrangements and connectivity at the site. Confirm how users sign in and what happens when uploads are interrupted.
What should a camera quote include?
Check whether the quote covers equipment, installation, power, connectivity, storage, maintenance, support and final deliverables. Ask for exclusions and charges for extensions or changes to scope.
How do you protect privacy when filming a construction site?
Choose camera angles that focus on project work and limit unnecessary views of workers, neighbours and public areas. Follow site procedures and seek advice where incidental capture cannot be avoided.
What happens to the images when the project ends?
Agree in advance who owns the images, how they can be exported, how long they will be retained and whether access ends with the service. Keep any required project copies in an appropriate record system.