Key Takeaways
A useful time lapse setup starts with the project decisions you need the footage to support. Plan its viewpoints, power, access and ongoing costs before installation.
- Define whether you need milestone records, progress reviews, stakeholder updates or a combination.
- Choose capture intervals and image quality to suit the project’s duration and intended use.
- Plan camera views around changing work areas, safety and the risk of future obstructions.
- Check power, mobile coverage and weather exposure at each proposed camera position.
- Agree on access, privacy, storage and footage delivery before the system goes live.
What civil construction time lapse systems do
Civil construction time lapse camera systems Australia projects use can create a visual record of work that unfolds over months or years. A camera captures images from a planned viewpoint at intervals set for the job, giving you a way to review changes that are easy to miss during day-to-day work. The result can support progress conversations and help explain the sequence of construction to people who are not on site. Start by being clear about what you need the record to show.
How cameras document long-running infrastructure projects
A consistent viewpoint helps you compare stages of a project over time. Images can show how a work area changes, when major elements appear and how separate phases fit together; they are a visual aid, not a replacement for formal site records or engineering documentation. Construction Time Lapse Specialists provides time lapse camera solutions for commercial, civil and infrastructure projects, with visual records intended to support communication, compliance and progress reporting.
For a useful record, agree on a few milestones in advance and consider whether one view will remain relevant as the site changes. A camera aimed at a single work zone may miss enabling works or later construction elsewhere, so map the expected sequence before settling on a position. A construction timelapse camera guide can help you think through project duration, views, power and maintenance as one connected plan.
Differences between time lapse, live streaming, and security footage
These approaches answer different questions. Time lapse captures selected images at intervals so you can review change over time. Live streaming provides a current view when available, while security footage is generally designed to record activity for security purposes. A system may combine different forms of visual monitoring, but you should confirm what the proposed equipment and service actually include rather than assuming one function comes with another.
A simple distinction can make early planning easier:
| Approach | What you review | Useful planning question |
|---|---|---|
| Time lapse | Images captured at set intervals | Which stages or changes should the record show? |
| Live streaming | A current camera view | Do approved users need a live view, and when? |
| Security footage | Recorded activity for security purposes | What security coverage and retention are required? |
| Site photography | Selected images taken at particular times | Which milestones need a detailed still image? |
The categories can overlap in a broader monitoring plan, but they should not be treated as interchangeable. Confirm image access, recording schedule, retention and intended use in writing, especially if different teams expect different kinds of visibility.
Typical uses across roads, bridges, rail, and utilities
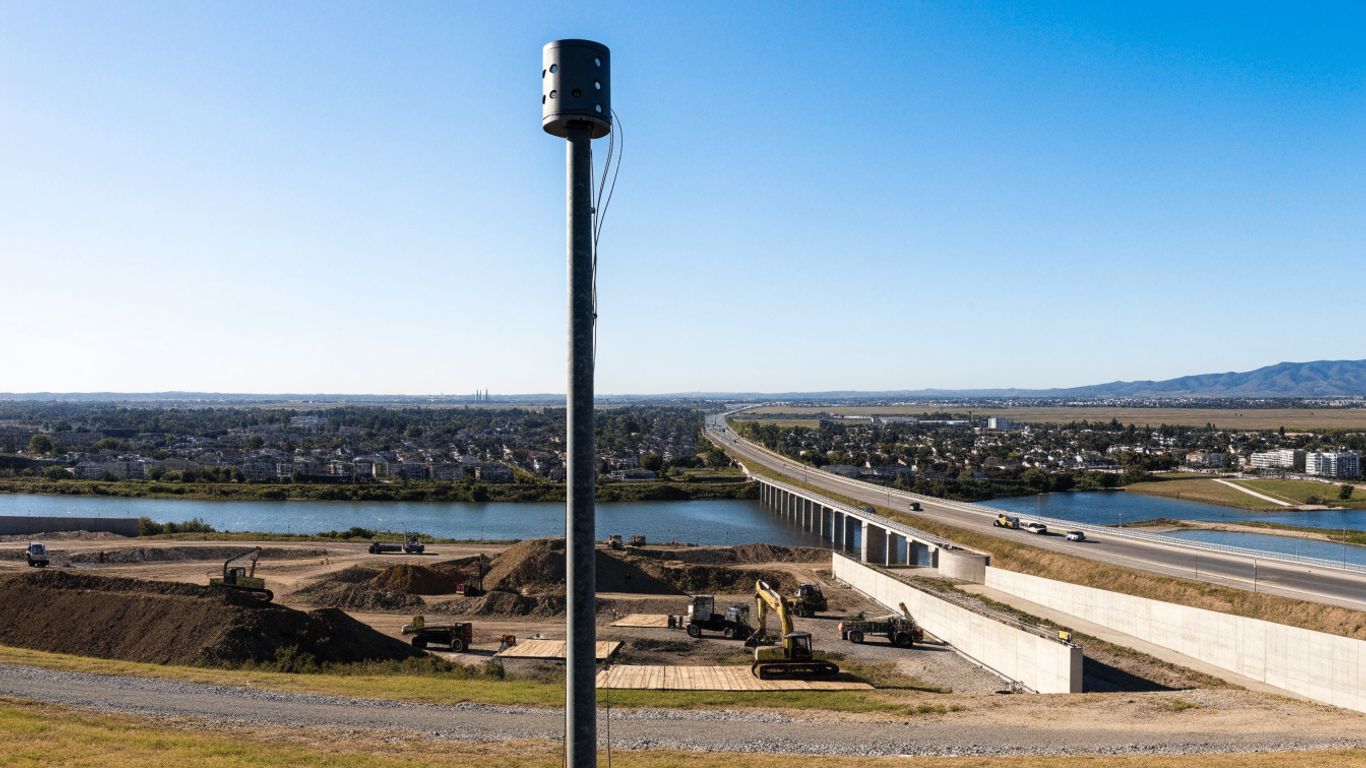
On a road project, a camera may document a changing work zone or a sequence of construction stages. Bridge, rail and utility works can also benefit from a consistent visual record where access is limited or the work progresses across a large area. The best viewpoint depends on what you need to see: a single camera may document one focal area, while a wider project may require several views to cover distinct work fronts.
Before you settle on a setup, match each proposed view to a practical purpose: progress review, stakeholder communication, project documentation or a final visual summary. If your project also needs imagery from more than a fixed viewpoint, Construction Time Lapse Specialists combines time lapse systems with 4K cameras, drone imaging and high-resolution photography. The appropriate mix depends on the project scope and the visual record you need.
How to choose a system for your project
The right system is the one that fits the project’s duration, location and intended use, not simply the one with the longest feature list. Start by defining the views and milestones you need, then check image quality, capture schedule, power and access against those requirements. You should also establish who will manage the system and how footage will be stored and shared. That groundwork makes supplier comparisons more useful.

Matching image quality and capture intervals to project goals
Image quality and capture frequency affect what you can review later. A frequent schedule can document gradual changes, while longer intervals may suit a broad overview of a slower-moving project; either way, the schedule should reflect what happens on site. Consider whether the images will be used for internal review, reporting, stakeholder updates or a finished video, and ask for an example of the expected output before you commit.
Use the following questions to compare requirements with a proposed system:
| Project need | What to check | Why it matters |
|---|---|---|
| Long project duration | Capture schedule and operating plan | The record needs to cover the intended phases. |
| Milestone review | Interval and viewpoint | Key changes should be visible in the image sequence. |
| Stakeholder updates | Image access and delivery format | Recipients need a clear, workable way to review progress. |
| Finished video | Image quality and editing arrangements | The final material may need a different workflow from routine review. |
Ask how changes to the work programme will be handled. If a project phase moves or a new work area becomes the priority, you may need to adjust the capture schedule or add a view. Construction Time Lapse Specialists provides 4K cameras as part of its visual monitoring services; confirm the suitability of any proposed image quality for your intended output and viewing conditions.
Comparing fixed, portable, and multi-camera setups
A fixed camera can maintain a steady viewpoint across a long programme, while a portable arrangement may suit a project where the most useful view changes over time. A multi-camera setup can cover separate work fronts or provide different angles, though each additional position brings its own installation, access and ongoing support considerations. Consider what you need to capture at each stage rather than assuming that more cameras automatically create a better record.
Sketch the site and mark the work areas that matter now and later. A camera position that works during early earthworks may be blocked when structures, plant or temporary facilities appear. Reviewing a camera placement planning guide can help you think ahead about height, sunlight, multiple views and later obstructions. Then ask the provider how a change of viewpoint would affect installation and continuity of the record.
Evaluating remote access, alerts, and reporting tools
Remote access can help you review images without travelling to site, but the details matter: ask who can log in, what they can view or download, and how access is removed when roles change. Confirm whether alerts or reporting tools are actually included, how they work and whether they suit your project workflow. Do not assume that every camera system offers the same features or that an alert replaces routine site checks.
A short list of questions will help you test the practical fit:
- Can the people who need to review progress access images from their usual location?
- What permissions can be assigned to staff, clients and other approved viewers?
- How often can images be viewed, downloaded or shared?
- What support is available if access or equipment stops working?
Answers should be specific enough to inform your operating plan. Construction Time Lapse Specialists provides secure remote portal access for viewing site progress; agree on the access arrangements and permitted users for your project. A clear plan for reviews and approvals can make the footage easier to use without widening access unnecessarily.
Where to place cameras on site
Camera placement is a planning decision, not a final installation detail. A strong view gives you meaningful coverage while staying clear of daily operations and avoiding unnecessary safety or access issues. Think about the site as it will change, including new structures, temporary works and shifting work fronts. Discuss proposed positions with the people who know the programme and site constraints.
Capturing key milestones and changing work areas
Begin with the milestones you want the images to document, then work back to identify the views that will make those changes easy to understand. A high-level overview may show relationships between work areas, while a closer view may better capture a specific phase. If the project moves across a corridor or has several active fronts, you may need more than one viewpoint or a planned camera move.
Before installation, compare the initial view with the later stages in the programme. Check whether new plant, hoardings or structures could obscure the subject, and decide who will review the image sequence as the project develops. This small amount of forward planning helps avoid a camera that records regularly but misses the changes you most wanted to see.
Planning viewpoints around access, safety, and site operations
The proposed camera position must work with site access and operating rules. Coordinate with site management before mounting equipment, and check whether installation requires a particular permit, induction or escort. Make sure the position does not obstruct access, interfere with work or create a hazard during installation or maintenance. A useful visual record should fit the site’s safety arrangements, not work around them informally.
For example, access equipment is part of the installation plan, so check that it is suitable for the task and site conditions; a guide to industrial platform ladders covers task height, mobility and safety features. Keep the camera’s field of view focused on the intended work area, and document who is responsible for approving any later changes to its position. That gives the site team a practical way to manage both initial installation and ongoing access.
Reducing obstructions, glare, and weather exposure
A view can become less useful when the sun enters the lens, dust accumulates on a housing or temporary works block the subject. Look at the proposed position at different times of day, and consider how nearby structures, vegetation and site traffic might change during the project. Where possible, choose a mounting point that protects equipment without narrowing the view or putting it in the way of routine work.
Make a plan for checking the image quality over time. Agree who will report an obstruction or dirty lens, how the issue will be assessed and whether a site visit is needed. The purpose is not to promise uninterrupted images in every condition; it is to identify likely problems early and have a sensible response when the view changes.
Powering and connecting cameras in Australia
A camera’s power and connectivity plan depends on its exact location and operating period. A serviced urban site may have different options from a remote work area, and temporary power arrangements can change as construction progresses. Check each proposed position rather than relying on a site-wide assumption. The installation plan should cover what happens if the power source, connection or access conditions change.

Choosing mains, solar, or battery power
Mains power may be an option where a suitable supply is available and remains accessible for the project duration. Solar or battery arrangements may suit locations without a convenient connection, but their suitability depends on the equipment, exposure and operating requirements. Ask the provider to explain the expected operating plan, maintenance needs and what happens during periods when conditions affect the available power.
A useful guide to solar time-lapse cameras can help you consider their role in construction documentation, but it should not substitute for checking the conditions at your specific location. Confirm whether installation and maintenance access can be arranged safely, and identify who will be notified if the system stops recording. The practical choice is the one that can be supported at the site throughout the planned capture period.
Assessing mobile coverage and remote-site connectivity
Do not assume that mobile coverage is consistent across an entire project or that signal at ground level reflects conditions at a proposed camera position. Check the connection at the actual location and consider whether temporary works, terrain or changing structures could affect it later. If immediate remote access is not essential, ask what image access will look like when a connection is unavailable and how footage will be retrieved.
Keep the connectivity requirement tied to the way you will use the system. Regular remote review may call for a different arrangement from a camera that is primarily intended to create a record for later delivery. Confirm any limits on remote access, the expected support process and the responsibilities of the site team before installation begins.
Planning for heat, dust, rain, and coastal conditions
Australian sites can expose equipment to heat, dust, rain and, in some locations, coastal conditions. Ask what environmental conditions the proposed equipment and mounting arrangement are intended to handle, and how the camera will be inspected during the project. Consider both the camera housing and the installation position: shelter may reduce exposure, but it should not compromise the planned view.
Include environmental checks in the project plan rather than treating them as a one-off installation concern. Confirm who will report damage or a degraded image and how maintenance visits will be coordinated with site operations. A clear support arrangement is especially useful on remote or long-running projects where routine access may take time to organise.
Managing installation, access, and compliance
Installation involves more than selecting a mounting point and switching on a camera. You need agreement on site access, responsibilities, user permissions and the handling of images. Those decisions can be straightforward when they are made early, but they are harder to resolve after stakeholders have come to expect a particular view or delivery schedule. Set expectations with the project team before the system is put into use.
Coordinating installation with site teams and contractors
Include the camera in site planning discussions with the relevant project and safety staff. Agree on installation timing, induction requirements, access equipment, mounting approval and any restrictions on work areas. If contractors or utilities teams have control of the intended location, confirm who needs to approve the work and how any future maintenance will be arranged.
The project may also involve separate building packages alongside civil work. Where that applies, guidance on choosing local builders offers a parallel example of checking licences, references and communication, though camera installation approvals still need to follow your own site procedures. Record the responsible contacts and escalation route so that changes to access or work sequencing do not leave the camera unattended.
Setting permissions for staff, clients, and stakeholders
Decide who needs to see the images and what each group needs to do with them. Site staff may need regular access for internal review, while clients or community stakeholders may only receive approved updates. Establish who grants access, who can download footage and how permissions are removed when a person no longer needs them.
Construction Time Lapse Specialists provides secure remote portal access to view site progress. For any system, confirm the available permission settings and align them with your organisation’s access and information-handling requirements. Keep a record of approved users and review it when project roles change, rather than allowing access to accumulate over time.
Addressing privacy, signage, and data-handling requirements
Before recording begins, assess what the camera can see beyond the intended work area. Consider neighbouring properties, public spaces, workers and visitors, and follow the privacy and signage requirements that apply to your project. Set rules for image access, storage, retention and sharing, and check with your organisation’s relevant advisers where obligations are unclear.
Keep project imagery separate from information that does not belong in a construction record. For example, AMH reports concern clinical interpretation, not site monitoring; that kind of sensitive material should not be mixed into project image workflows. A defined handling process, including who may approve external sharing, reduces the chance that useful progress footage is circulated without appropriate review.
Turning footage into useful project updates
Footage is most valuable when it answers a question for someone who needs to understand the project. Decide whether the audience needs a close review of a milestone, a recurring progress update or a broader visual summary. Then set a simple review and approval process so the images are shared with context. A sequence of pictures is easier to interpret when it is tied to dates, stages and the purpose of the update.
Creating milestone reviews and progress reports
Use the capture schedule and project programme together when reviewing progress. Select images that show a meaningful change, note the relevant date and work stage, and avoid presenting a visual impression as a substitute for measured progress data. The images can add context to a report, but they should be read alongside the project’s normal records and reporting process.
If the team intends to prepare a final video, clarify the expected format, review process and delivery date early. Construction Time Lapse Specialists provides visual monitoring through a project’s lifecycle, including secure remote portal access to site progress. Confirm which footage and outputs are included in the specific project arrangement, and who will approve selected images before they are used in reports or presentations.
Sharing approved footage with clients and communities
Different audiences need different levels of detail. A client may want a focused milestone update, while a community audience may benefit from a concise overview that avoids sensitive site information. Agree who approves each version, what context accompanies it and which channels are permitted before footage is circulated.
If you are preparing social content from already approved footage, ShortMind AI is one example of a separate tool described as turning long videos into social-ready shorts. That does not replace review by the project team: check the selected moments, captions and framing before publishing. Keep the original record and the approved public version distinct so that edits do not become confused with the project archive.
Estimating storage, support, and project-long operating costs
A project budget should account for more than the initial camera installation. Ask about the planned capture duration, storage and access arrangements, maintenance, support, any camera moves and the final footage delivery. Clarify which items are included and which may change if the project schedule or site conditions shift.
When comparing proposals, ask for costs and responsibilities in a form you can review alongside the project programme. Check how long images will remain available, what happens at project close and whether you can retrieve the material in a usable format. This makes it easier to judge the full operating commitment, not just the price of getting a camera on site.
Conclusion
A well-planned civil construction time lapse system begins with a clear purpose, then brings together suitable viewpoints, a realistic capture schedule, reliable power and connectivity, and agreed rules for access and sharing. If you confirm those details with the project team before installation, the resulting visual record is more likely to be useful throughout construction and at close-out.
Frequently Asked Questions
What is a civil construction time lapse camera system?
It is a camera arrangement that captures images at planned intervals to create a visual record of construction activity over time. The setup can be tailored to a project’s duration, viewpoints and intended use.
How often should a construction camera capture images?
The right interval depends on how quickly the work changes and what you need the images to show. Discuss the project programme and intended outputs before choosing a schedule.
Can one camera cover an entire infrastructure project?
Sometimes, but a single view may not cover separate work fronts or changing areas. Map the project stages and important viewpoints to see whether one camera is sufficient.
Is time lapse the same as live streaming?
No. Time lapse uses images captured at intervals to show change over time, while live streaming provides a current view when available. Security footage is a separate function with its own purpose and requirements.
What should you check before installing a camera on site?
Confirm the viewpoint, mounting approval, safe access, power, connectivity, environmental exposure and any applicable privacy or signage requirements. Coordinate the installation with site management and relevant contractors.
How do you share construction footage with stakeholders?
Agree on who can access the images, who approves external sharing and what context should accompany an update. Choose a format and schedule that suit the audience and the project’s information-handling rules.
What costs should you include in a time lapse camera budget?
Consider installation, operating duration, power and connectivity arrangements, storage, maintenance, support, camera moves and final footage delivery. Ask which items are included and how changes to the programme may affect the cost.