Key Takeaways
A successful construction timelapse starts with a clear purpose, not a camera specification. Plan the view, power, access and review process before installation.
- Define the project duration, audience and important milestones first.
- Choose a stable, secure position with a repeatable view of the work.
- Match resolution, interval, power and connectivity to site conditions.
- Keep capture settings, framing and maintenance consistent throughout the build.
- Treat the final footage as a useful project record, not only a marketing asset.
Define your project’s timelapse requirements
A construction timelapse camera should be selected around the project’s purpose and working environment. A short residential build has different requirements from a multi-year civil project, while a camera used for client reporting may need different access controls from one used mainly for marketing. Start by agreeing what the footage must show, who needs it and how long the system must remain operational.
The construction timelapse planning guide provides a useful framework for setting goals around reporting, marketing and monitoring. Those decisions make the later equipment comparison much more practical.
Set the construction timeline and capture duration
Begin with the programme rather than the camera. Note the planned mobilisation date, major work packages, expected completion and any periods when the site will be inactive. A system installed for excavation may need to remain useful through structure, fit-out and landscaping, so allow for changes in the scene and the mounting environment.
Capture duration also affects power, storage and maintenance. Ask whether the footage will be reviewed daily, assembled into monthly updates or held as a record until practical completion. The longer the project, the more valuable remote status checks and a planned maintenance schedule become.
Choose the views and milestones to document
A single wide view can explain overall progress, but it may not show the detail needed for a particular package of work. Consider whether the camera should cover the main elevation, crane activity, access roads, excavation, neighbouring interfaces or a distinctive architectural feature. A repeatable viewpoint is usually more useful than a collection of changing snapshots.
List the milestones that will give the finished sequence a clear structure: site establishment, demolition, excavation, foundations, structural framing, enclosure, services, fit-out and handover. This also helps the editor identify useful transitions later.
Decide who will access and use the footage
Project directors may want a quick remote overview, while the superintendent may need detailed images for weekly reporting. Clients, consultants, government stakeholders and marketing teams can also have different expectations about resolution, frequency and delivery format. Agree access levels before the first upload is made.
A secure remote portal can make footage easier to share without distributing raw files to everyone involved. Construction Time Lapse Specialists provides secure remote portal access for viewing site progress, which suits teams that need visibility without being physically present.
Match the system to site conditions and risks
Assess the site before choosing equipment. Dust, rain, salt air, vibration, heat, temporary fencing, cranes and changing work zones can all affect a camera’s useful life and field of view. Consider the likelihood of accidental impact as well as deliberate tampering, particularly where equipment is installed near public boundaries or busy access routes.
Power and network coverage deserve the same attention. A shaded location may limit solar performance, while a basement or remote civil site may require a different connectivity plan. The right system is the one that can keep producing a dependable record under the conditions actually found on site.
Compare construction timelapse camera features
Specifications matter, but only when they relate to the finished record. Resolution, interval control, weather resistance, power and connectivity work together; choosing one impressive feature does not compensate for an unstable installation or missing images. Compare complete systems and the support included with them, rather than looking at the camera body alone.
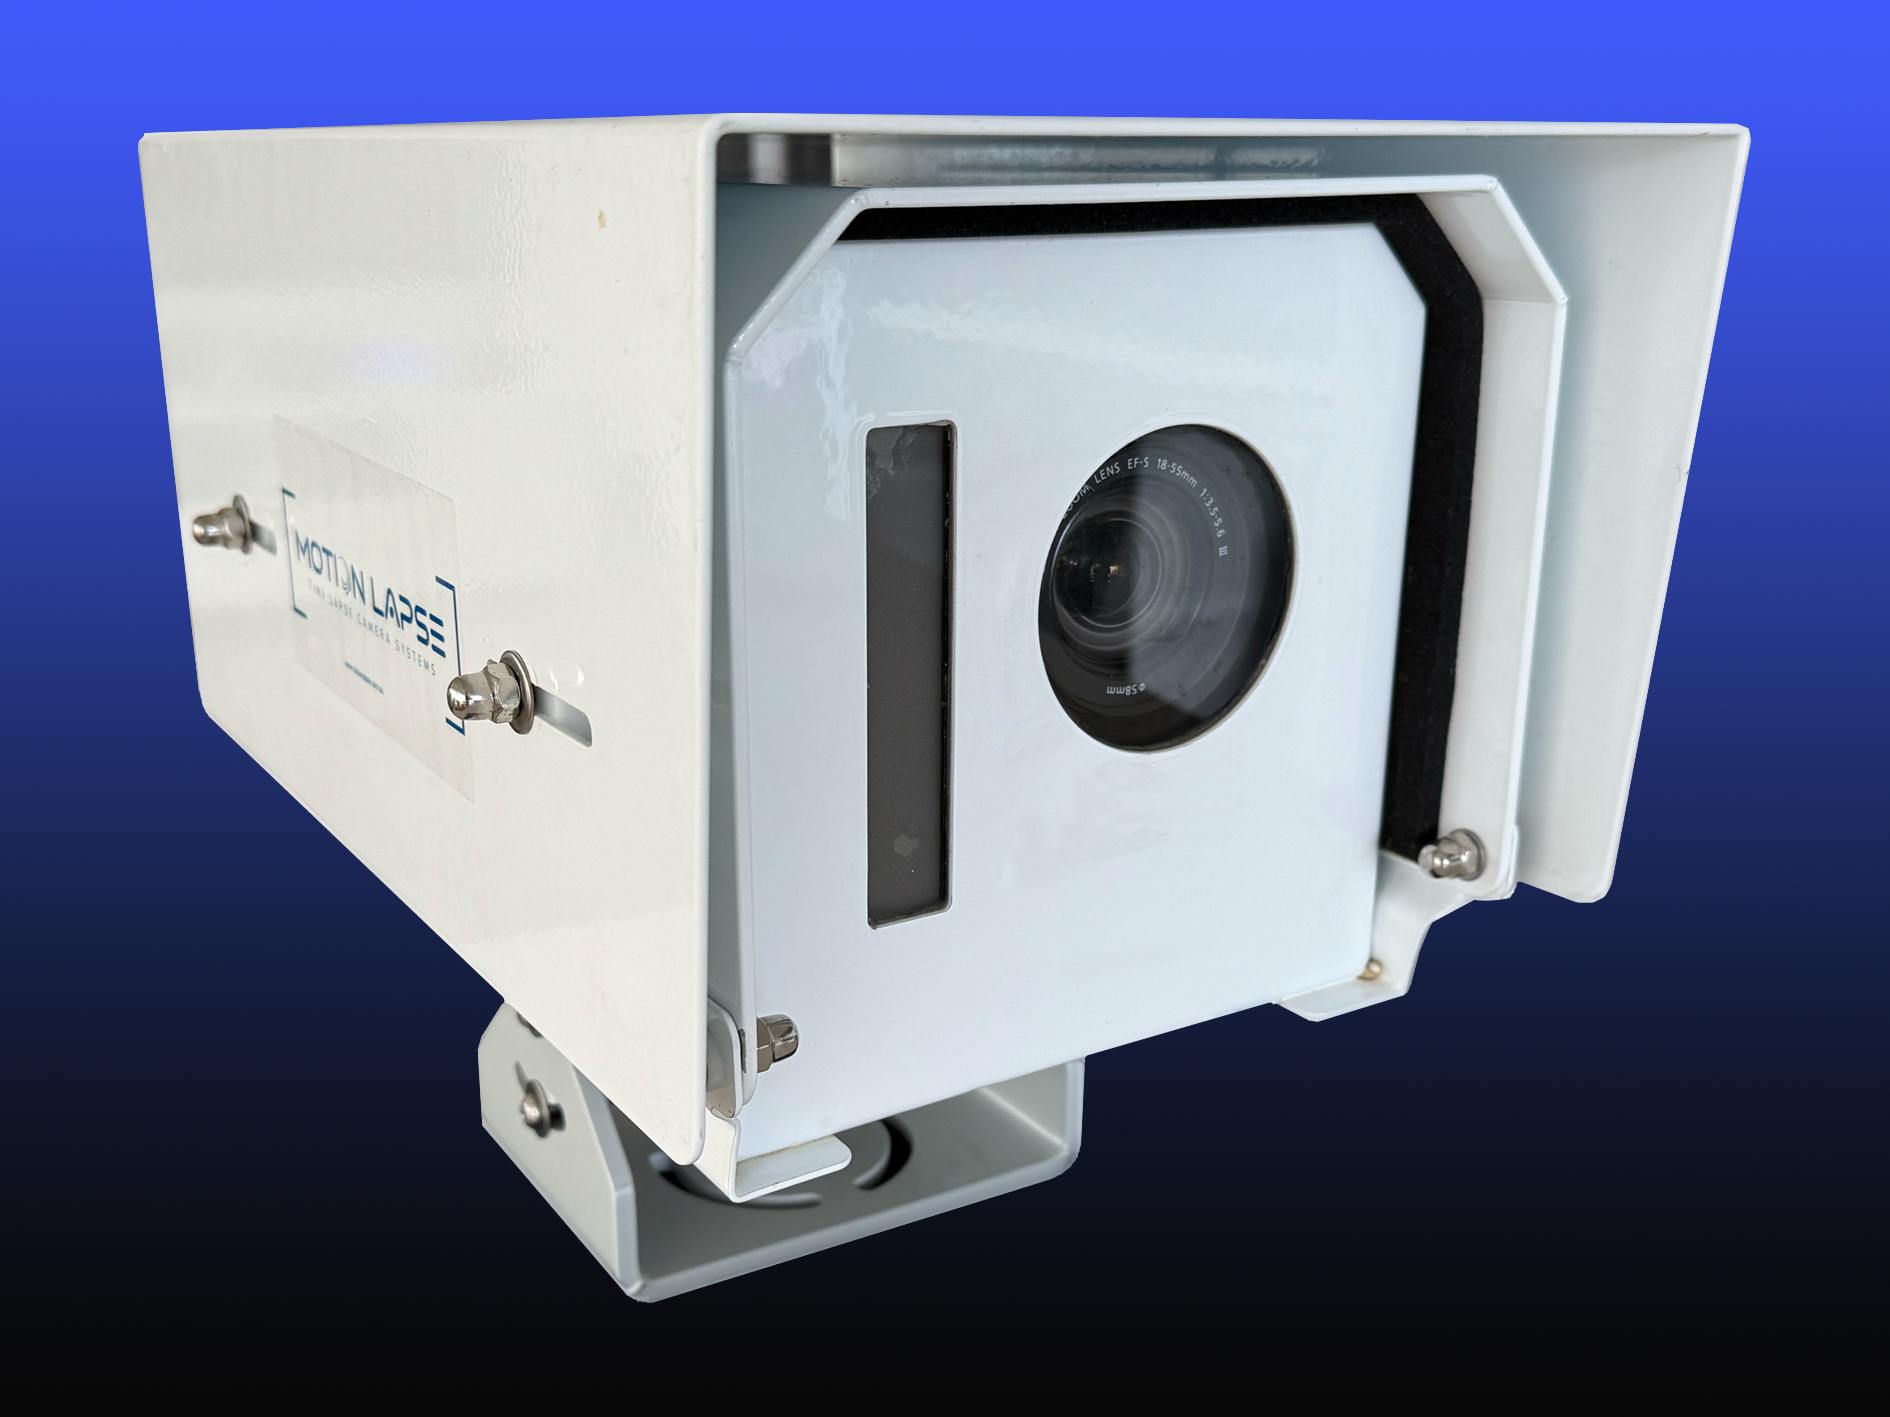
The following image illustrates the kind of dedicated equipment used for long-term site documentation.
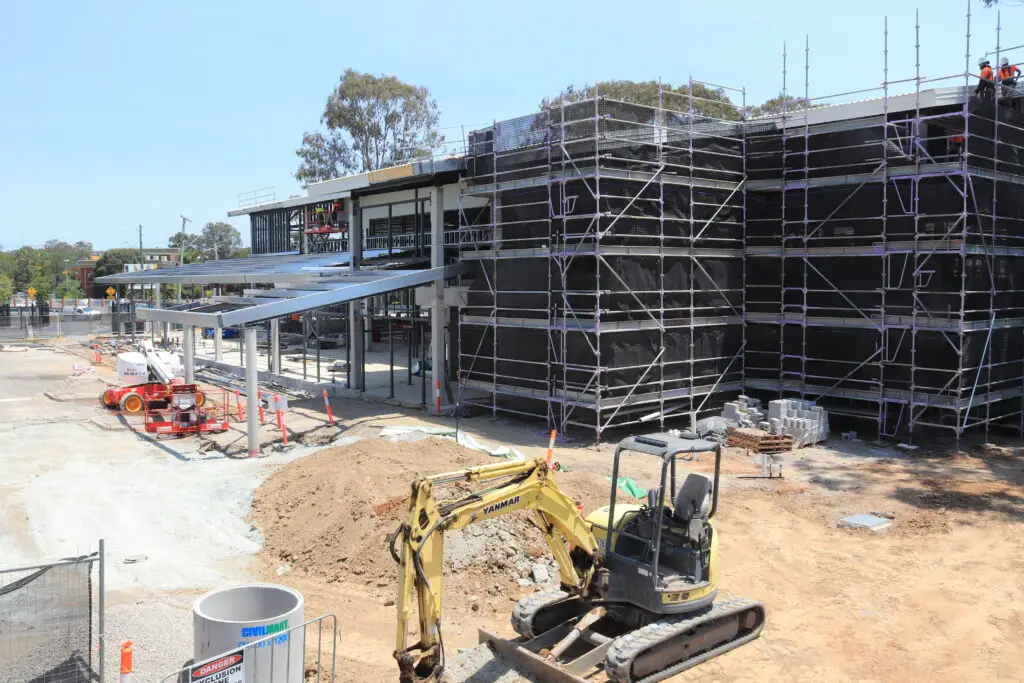
Image quality, resolution and frame rates
Higher resolution provides more room to crop or inspect a frame, but the best setting depends on the intended output and available storage. A wide construction view should retain enough detail to make progress legible without producing files that are unnecessarily difficult to manage.
Frame rate is mainly a post-production decision for timelapse. What matters at capture stage is a stable interval and consistent image quality across changing weather and daylight. Construction Time Lapse Specialists provides 4K cameras and high-resolution photography for commercial, civil and infrastructure projects, making image quality a planning consideration rather than an afterthought.
Battery life, solar power and mains options
Power planning should include normal operation, cloudy periods, outages and safe access for servicing. Mains power may be practical on a developed site, while solar and battery arrangements can suit locations where cabling is temporary, exposed or unavailable. In every case, confirm where the system will be mounted and how a technician can reach it safely.
Do not calculate power only for the camera. Include communication equipment, charging hardware and any seasonal reduction in solar generation. A modest reserve can prevent gaps caused by a delayed electrical connection or several days of poor weather.
Weatherproofing, vandal resistance and security
Construction sites are hard on equipment. Look for a housing and mounting arrangement suited to rain, dust, heat and wind, then consider how the camera will be protected from impact, theft and unauthorised adjustment. Weatherproofing is not a substitute for sensible placement, but it reduces the risk created by ordinary exposure.
Security also includes the mounting hardware and the route of power or network cables. Keep equipment above likely impact zones where possible, avoid creating a climbing aid and record the original framing after installation. These small controls help preserve continuity.
4G, 5G, Wi-Fi and offline connectivity
Connectivity determines how quickly images can be viewed and whether issues can be detected before they create a long gap. Cellular service can be useful on changing sites, Wi-Fi may suit a stable connected compound, and offline capture can work where remote access is not essential. Test the actual mounting position rather than relying on a signal check at the site office.
Data use depends on resolution, capture interval, upload schedule and whether files are synchronised continuously. Agree what must be available remotely and what can remain on local storage. That balance controls both responsiveness and running cost.
Plan the camera position and installation
Installation is where a good equipment choice becomes a useful visual record. The camera needs a stable point, a clear view and enough protection to remain in place as the project changes around it. A few minutes spent checking the proposed angle can prevent months of obstructed or poorly framed images.
The installation should also be documented. Record the height, orientation, lens setting, power arrangement and initial test image so that future checks have a reliable reference.
Select a stable, elevated mounting point
Choose a point that is unlikely to move when plant operates nearby or temporary structures are removed. Roof edges, permanent poles and secure structures may offer useful elevation, but every option must be assessed for safe access, wind loading and the effect of future demolition or construction work.
Avoid mounting to temporary fencing, scaffolding that will be dismantled or a structure likely to vibrate. The camera installation guide emphasises pre-installation assessment, secure mounting, power solutions and ongoing monitoring, all of which should be considered before work begins.
Frame the site for useful progress coverage
Aim to include a recognisable reference such as the principal building line, road interface or permanent neighbouring feature. Leave enough sky and ground to show change without allowing a foreground obstruction to dominate the frame. If the site is too broad for one view, use additional cameras rather than forcing a single wide image to carry every story.
Take test images from the proposed position at different stages of the day. Check that cranes, hoardings, stored materials and temporary offices will not hide the work that matters most.
Account for sunlight, shadows and seasonal changes
Sunlight changes the apparent colour, contrast and visibility of a site. A view that works in winter may face glare or deep shadows in summer, and a new tower or crane can alter the light pattern completely. Where possible, point away from the strongest direct glare and retain enough scene detail to compare images consistently.
Seasonal conditions also affect vegetation, water on the lens and solar charging. Keep a note of the surrounding environment at installation so later changes are not mistaken for camera movement or exposure failure.
Protect equipment from theft and accidental damage
Use tamper-resistant fixings, place the unit outside routine plant paths and coordinate with the site manager before installation. The camera should not obstruct access, create a trip hazard or interfere with lifting operations. Clear labelling can help workers understand that the unit is part of the project record, while restricted access limits unnecessary handling.
Where the site is especially exposed, add regular physical inspections to the project’s existing safety checks. A small change in angle can undermine months of otherwise usable footage.
Configure capture settings for consistent results
Consistency is the central technical goal. The finished sequence should show genuine progress rather than changes caused by an accidental reset, shifting mount or irregular exposure. Establish settings in writing and make the first few days a test period, not a set-and-forget exercise.
A construction timelapse camera is most useful when its images can be compared over time. That means matching interval, framing, exposure approach, time zone and file handling to the reporting rhythm of the project.
Choose the right interval for construction activity
The interval should reflect how quickly meaningful change occurs. Structural work and concrete pours may benefit from more frequent captures, while slower fit-out or landscaping can be documented with a wider interval. Consider working hours, weekend activity and important one-day events before settling on a schedule.
A practical interval also controls the length of the final video. Test a short sample first, then adjust it after reviewing whether people, plant and changing work fronts appear clearly rather than as distracting flashes.
Manage storage, uploads and data usage
Set a retention approach before the card or cloud account fills. Decide which original images must be retained, how often files are uploaded and who checks that synchronisation is still working. If mobile data is used, estimate the monthly volume from the image size and capture frequency rather than guessing.
The project timelapse camera guide links storage, power, lens choice, weather resistance and remote access to the project’s specific needs. That joined-up view is useful because a storage decision can affect capture settings just as much as a camera decision.
Keep framing and exposure consistent
Lock the camera securely and avoid changing the lens or zoom after the baseline image has been approved. Where the equipment allows it, use settings that reduce major exposure shifts while still accommodating daylight changes. Review a sequence of images, not only a single frame, before confirming the configuration.
Use a written baseline with the installation date, orientation and selected interval. If framing changes for an approved reason, record the change and mark the transition in the production notes so viewers understand what happened.
Schedule maintenance and equipment checks
Maintenance should be assigned to a named person or service provider. A short inspection can identify a dirty lens, water ingress, a failing battery, a blocked view or a network interruption before the gap becomes significant. Coordinate visits with site access rules and current safety controls.
A useful inspection sequence includes:
- Check the lens, housing and mounting hardware.
- Confirm power status, battery condition and solar position.
- Review recent uploads and compare framing with the baseline.
- Confirm storage capacity, clock settings and network connection.
After each visit, save a brief record of what was checked and any adjustment made. That history supports accountability and makes troubleshooting much faster.
Turn site footage into a professional progress video
Capture is only the first part of the workflow. Raw images need to be reviewed, ordered and shaped around the story of the build. A polished progress video should be easy for a client or stakeholder to understand without requiring specialist knowledge of every construction stage.
Plan the output before editing. A short meeting update, a compliance record and an end-of-project showcase may all use the same source images but require different duration, pacing and detail.
Review and organise captured images
Create a folder structure based on project, camera, date and output version. Keep original files separate from edited exports, and record any gaps, framing changes or periods affected by weather. This preserves context when someone asks why a particular stage appears to jump.
Review representative images at regular intervals rather than waiting until completion. Early checks catch problems while there is still time to correct them.
Highlight key construction milestones
Use the programme and site diaries to identify moments that explain progress: excavation, foundations, structure, enclosure, major installations and handover. Avoid treating every day equally if the result becomes too slow or repetitive. The strongest sequence usually combines continuity with selected points of emphasis.
Add simple labels where they clarify the stage or location. A viewer should be able to understand what changed and why the change matters.
Add branding, dates and project information
Titles, dates and project identifiers give the footage a professional context. Keep them legible and restrained so they support rather than cover the work. If several cameras are used, identify the viewpoint and make any change in camera position clear.
Construction Time Lapse Specialists combines visual monitoring with high-resolution photography and drone imaging, allowing project teams to consider ground-level and broader perspectives when the brief calls for them. The chosen format should still reflect the permissions and purpose of the project.
Export videos for clients, stakeholders and marketing
Create separate exports where audiences have different needs. A client update may favour a short, captioned overview, while an internal review may need more continuity and a higher-resolution file. Keep an approved master and name each delivery clearly with the date and version.
Before release, check that no private information, unsafe activity or unauthorised person is unnecessarily prominent. A final review protects the project record as well as the organisation’s reputation.
Manage privacy, safety and project compliance
Visual records can support communication and accountability, but they also capture people, vehicles, neighbouring properties and sometimes sensitive project information. Treat the camera as part of the site’s information management and safety planning, not as an isolated piece of equipment.
The project team should document the purpose of recording, the intended field of view, access permissions and retention period. These controls are easier to apply when agreed before installation.
Protect workers, visitors and neighbouring properties
Frame the site so that the project remains the subject and unnecessary views of adjoining homes, public areas or personal activities are minimised. Tell workers and visitors about the recording process through appropriate site communication and signage where required. Avoid positioning the camera where it could distract operators or encourage unsafe access for maintenance.
If a neighbouring property enters the frame, consider whether the angle can be narrowed or the image masked during editing. Site-specific advice may be needed for unusual risks; unrelated property matters, such as bee hive removal, should remain with the appropriate specialist rather than being folded into a camera procedure.
Follow Australian privacy and workplace requirements
Privacy obligations can depend on the state, the people recorded and the purpose of collection. Workplace health and safety duties also apply to installation, inspection, working at height, electrical connections and access near plant. Obtain advice where the project involves public land, sensitive facilities or extensive worker monitoring.
For a broader legal question outside the camera scope, Lawgical Law Corporation describes practical legal services and confidential handling of applications. The point is not to substitute a generic article for legal advice, but to recognise when a project needs qualified guidance.
Control user permissions and cloud access
Give each user only the access needed for their role. Project administrators may manage devices and exports, while clients may need view-only access to selected footage. Use strong credentials, remove access when people leave the project and keep a record of who can download or share files.
Remote visibility is valuable only when it remains controlled. Review permissions when the project changes stage, consultants rotate or a package is handed over.
Create a backup and footage retention policy
Decide how long original images, edited videos, inspection notes and access records should be kept. Use more than one storage location where the footage is important, and test that backups can actually be opened. Retention should reflect contractual, compliance, dispute and marketing needs rather than an arbitrary storage limit.
A short policy can state the source of the files, responsible owner, backup frequency, deletion approval and process for responding to a request about captured material. That makes the record easier to manage at completion.
Measure the value of construction timelapse footage
The value of a timelapse system is not measured only by the final video. It may reduce uncertainty in meetings, give remote stakeholders a common visual reference and preserve an accurate sequence of changing site conditions. Those benefits are strongest when the footage is planned around real project decisions.
At review points, ask who used the images, what question they answered and whether the information arrived in time to matter. This turns visual documentation into a managed project resource.
Improve client communication and reporting
A consistent view can make weekly or monthly progress easier to explain than a collection of unrelated photographs. Use selected frames alongside programme updates, written commentary and current risks. Clients can see the context of change without needing to visit every work front.
Construction Time Lapse Specialists creates reliable visual site records to support communication, compliance and progress reporting throughout a project’s lifecycle. The record works best when it is incorporated into the reporting calendar from the beginning.
Support quality assurance and dispute resolution
Timelapse images can provide context around access, sequencing, weather and visible progress. They should not be treated as a substitute for inspection records, measurements, approved drawings or contractual notices. Preserve original files and note any gaps so that the material remains credible when reviewed later.
If footage is to support a formal matter, limit editing to clearly documented copies and retain the source material. A clear chain of custody is more useful than a visually impressive export with uncertain history.
Strengthen project marketing and tender presentations
A well-edited sequence can show the scale, complexity and care involved in a project. Select footage that reflects the intended audience and confirm that people, logos, neighbouring properties and client information can be shown. Marketing should follow the project’s approval process rather than assuming that every captured frame is publishable.
Related design and property services often use visual material carefully too. For example, Victory Closets describes 3D renderings and professional installation in its own custom-organisation context; that is a useful reminder that images should explain a service clearly without overstating what they prove.
Calculate equipment, data and production costs
Build a complete cost model before approval. Include installation, mounting, power, connectivity, storage, maintenance, retrieval, editing and staff time. If the system is hired, compare the package inclusions with the cost of purchasing, maintaining and eventually removing equivalent equipment.
A simple comparison can make the decision more transparent:
| Cost area | Questions to ask | Typical planning outcome |
|---|---|---|
| Equipment | Is the camera bought, hired or supplied as a managed system? | Capital or project cost |
| Power and data | What are the ongoing connection and charging requirements? | Monthly operating allowance |
| Maintenance | Who checks the lens, mount, battery and uploads? | Scheduled labour or service fee |
| Production | Are editing, captions and multiple exports required? | Per-video or included scope |
After calculating the total, compare it with the decisions the footage supports and the cost of missing a key record. The right system is not necessarily the least expensive one; it is the one whose reliability and output match the project’s purpose.
Request a Project Assessment
If you need a construction timelapse camera, speak with Construction Time Lapse Specialists about a system matched to your project, site conditions and reporting needs. You can also request project advice before installation so the capture plan, equipment and ongoing support are considered together.
Conclusion
A dependable construction timelapse camera is the result of thoughtful planning, secure installation, consistent settings and disciplined file management. Define the story first, then select equipment and support that can preserve that story through changing site conditions, project stages and stakeholder needs.